The Ultimate Guide to Caring for Air Plants
Everything you need to know about these fascinating epiphytes – from watering to displaying and troubleshooting
Introduction to Air Plants
What are Air Plants?
Air plants (Tillandsia) are unique epiphytes that don’t require soil to grow. In their natural habitat, they attach themselves to trees, rocks, or shrubs, absorbing nutrients and moisture from the air through specialized structures called trichomes.
Why They’re Popular
Air plants have become increasingly popular houseplants because they’re:
- Low maintenance and versatile
- Perfect for small spaces and apartment living
- Available in a variety of shapes, sizes, and textures
- Can be displayed in creative ways since they don’t need soil
- Many varieties produce colorful blooms
Important to Remember:
Never plant air plants in soil! They’re epiphytes, which means they grow attached to other plants in nature and get their nutrients from the air and water around them.

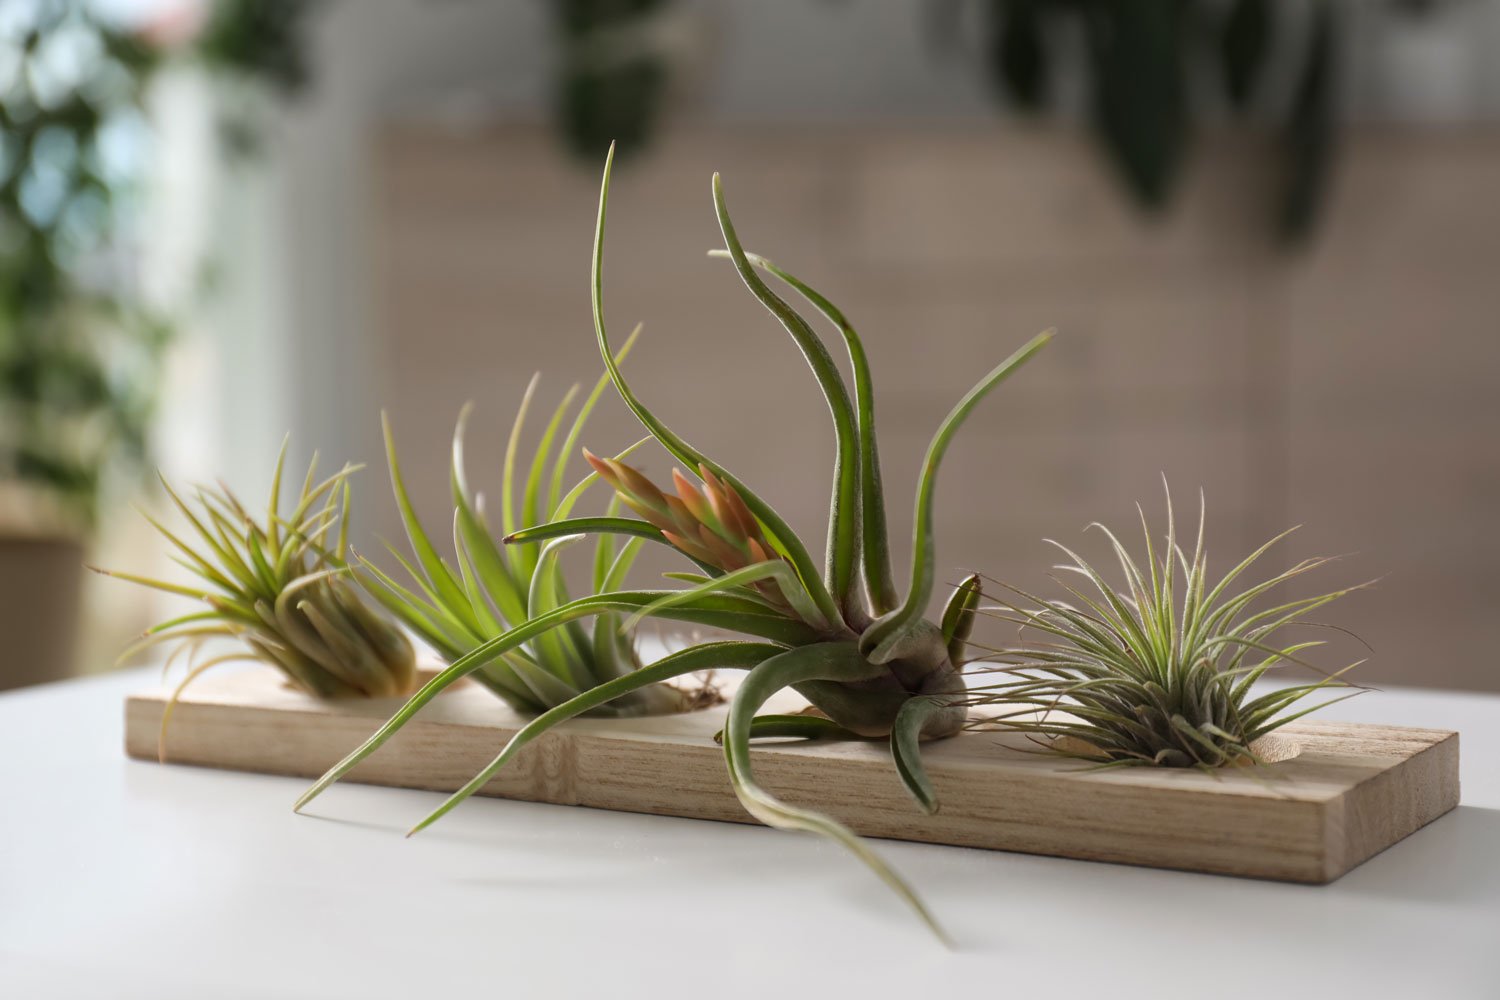
Various Tillandsia air plant species showing different shapes and textures
Water Requirements
:strip_icc()/BHG-gardening-houseplants-care-how-to-water-air-plants-hero-4d8378229e3148639b05bf09f6dbb978.jpg)
Soaking air plants in a bowl of water is the most effective watering method
The Soaking Method
The most effective way to water air plants is by soaking them thoroughly. Here’s how:
Weekly Soak: Submerge your air plants completely in water for 20-30 minutes once a week.
Shake Off Excess: After soaking, gently shake the plants to remove excess water from between the leaves and base.
Dry Thoroughly: Place plants upside down on a towel in a bright area with good air circulation. They should be completely dry within 1-3 hours.
Pro Tip:
Adjust your watering schedule based on your climate. In hot, dry environments, soak more frequently or add misting between soakings. In humid environments, you may need to water less frequently.
Water Type Matters
- Best choices: Rainwater, aquarium water, or filtered water
- Acceptable: Tap water that has sat for 24 hours (to allow chlorine to dissipate)
- Avoid: Distilled water (lacks minerals) and softened water (too salty)
Warning:
Never let air plants sit in standing water! Always ensure they dry completely after watering to prevent rot.
Light Requirements
Finding the Perfect Light
Air plants thrive in bright, indirect light. Here’s what you need to know:
| Light Type | Suitability | Notes |
|---|---|---|
| Bright indirect light | Excellent ✓✓ | Ideal placement: Near east or north-facing windows |
| Filtered sunlight | Good ✓ | Through a sheer curtain or nearby a window |
| Direct sunlight | Avoid ✗ | Can burn leaves, especially afternoon western exposure |
| Low light | Poor ✗ | Plants will survive but not thrive; growth slows significantly |
| Artificial light | Acceptable ✓ | Full-spectrum fluorescent lighting within 36″ of plants |
Placement Suggestions:
- East-facing windows provide gentle morning light
- North-facing windows work well in summer
- South-facing windows with sheer curtains provide filtered light
- Rotate plants occasionally for even exposure
- Keep 1-3 feet away from full-spectrum artificial lights
Air plants thrive in bright, indirect light conditions
Air Circulation
The Importance of Good Air Flow
Despite their name, air plants don’t just need air to survive—they need good air circulation. Proper airflow helps prevent moisture-related issues and ensures plants can effectively absorb nutrients.
Do’s
- Ensure plants dry completely within 1-3 hours after watering
- Place in areas with natural air movement
- Use open containers or displays that allow airflow
- If using terrariums, choose ones with large openings
- Occasionally relocate plants to refresh air exposure
Don’ts
- Avoid completely enclosed containers
- Don’t surround plants with moss (holds too much moisture)
- Avoid placing in stagnant air areas
- Don’t place wet plants in areas without airflow
- Avoid exposing to strong, continuous drafts that dry plants too quickly
Important Note:
Air plants in glass containers require extra attention. After watering, ensure they dry completely before returning them to their container, and periodically remove them to receive fresh air circulation.
Temperature & Environment
Creating the Right Climate
Air plants are native to tropical and subtropical regions, so they prefer warm temperatures and moderate humidity. Understanding their environmental needs is key to success.
Temperature Range
- Optimal temperature range: 50-90°F (10-32°C)
- Preferred range: 60-80°F (15-27°C)
- Can tolerate brief periods of: 40-95°F (4-35°C)
- Cannot tolerate: Frost or freezing temperatures
Humidity Considerations
Air plants appreciate moderate humidity levels of 40-60%. Indoor environments, particularly in winter with heating systems, often have lower humidity than air plants prefer.
Tips for Increasing Humidity:
- Group plants together to create a microclimate
- Place in naturally humid areas like kitchens or bathrooms
- Use humidity trays (water-filled trays with pebbles)
- Mist plants more frequently in dry environments
Seasonal Adjustments
Air plants may need different care depending on the season. In winter, when indoor air is drier and ambient light is lower, you may need to:
- Increase misting frequency
- Move plants closer to light sources
- Protect from cold drafts and heating vents
Popular Air Plant Varieties
With over 650 species of Tillandsia, there’s a wide variety of shapes, sizes, and colors to choose from. Here are some popular varieties that are perfect for beginners and enthusiasts alike:
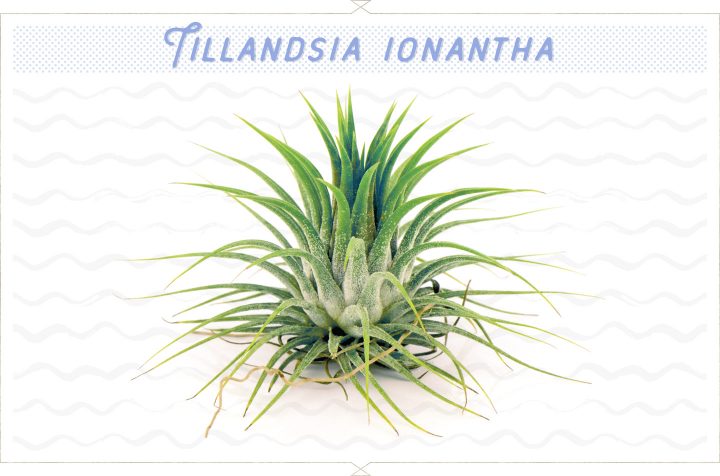
Tillandsia ionantha
Also known as the “Sky Plant”
- Size: Small (1-3 inches)
- Features: Turns bright red/pink when blooming
- Care level: Very easy, perfect for beginners
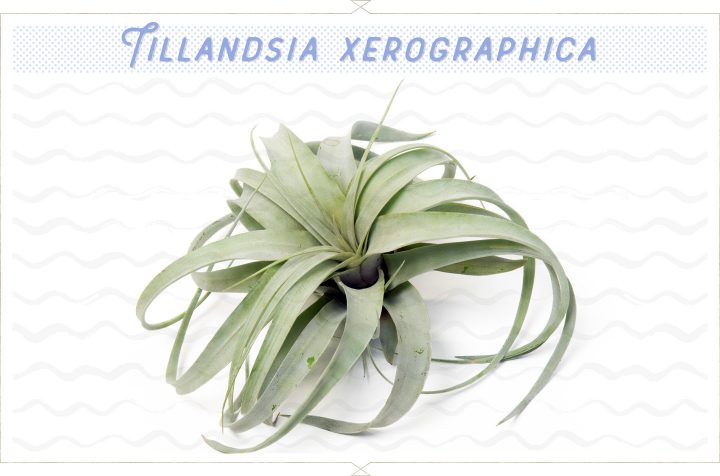
Tillandsia xerographica
The “King of Air Plants”
- Size: Large (6-15 inches)
- Features: Dramatic rosette shape with silvery-gray curling leaves
- Care level: Moderate, needs less water than other varieties
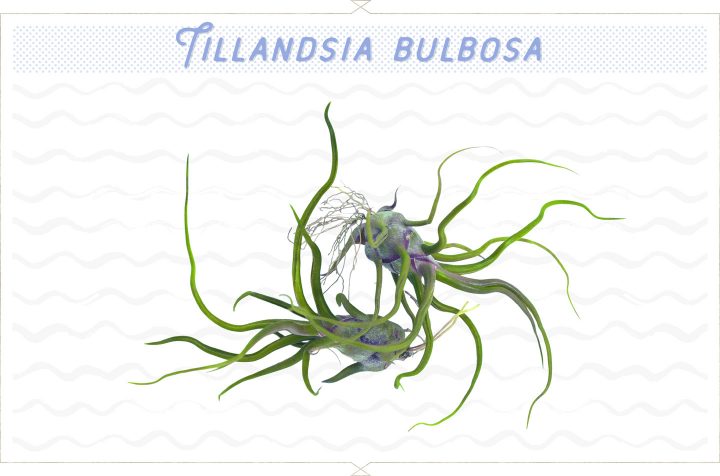
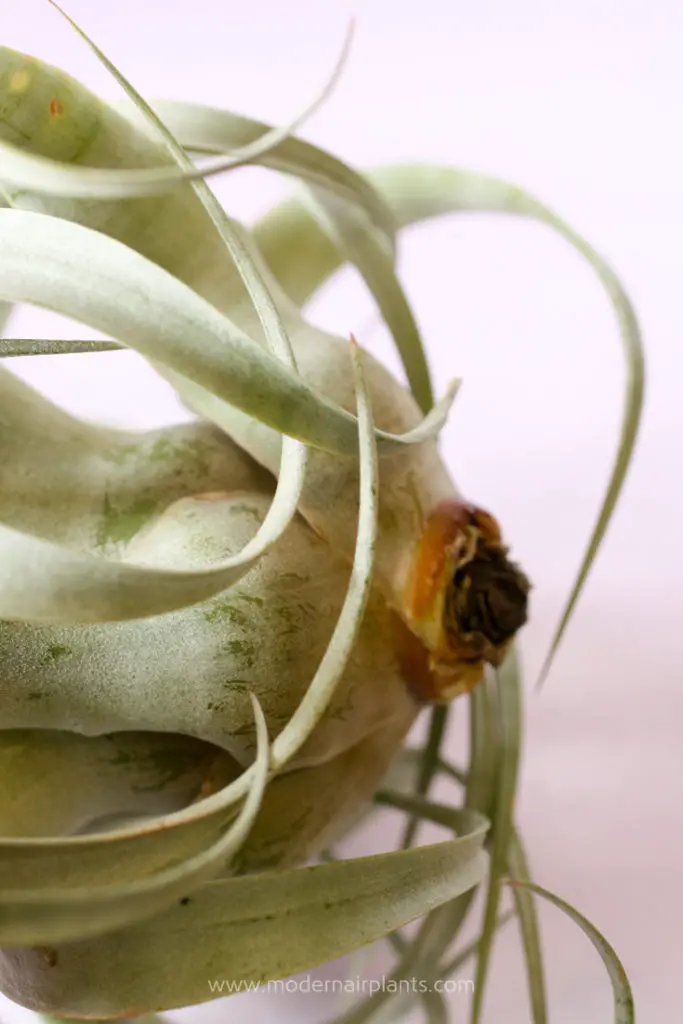
Tillandsia bulbosa
The “Bulbous Air Plant”
- Size: Small to medium (3-6 inches)
- Features: Distinctive bulb-like base with tentacle-like leaves
- Care level: Moderate, prefers higher humidity
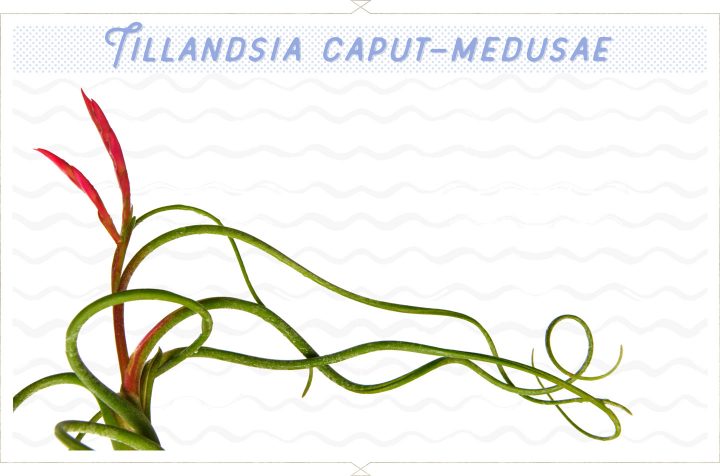
Tillandsia caput-medusae
“Medusa’s Head”
- Size: Medium (4-7 inches)
- Features: Tentacle-like curling leaves resembling Medusa’s hair
- Care level: Easy to moderate
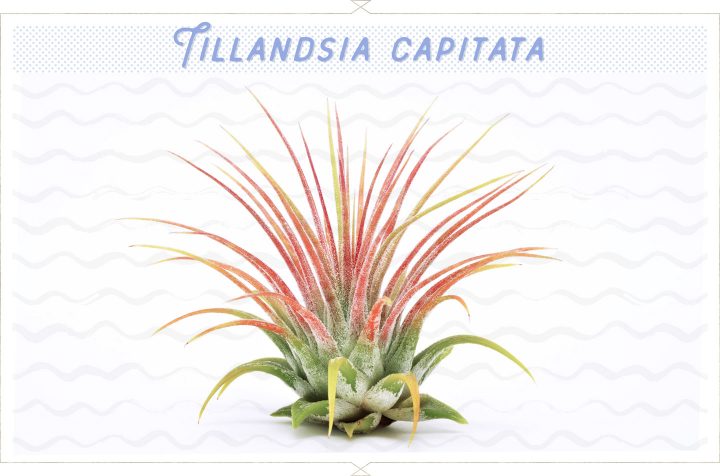
Tillandsia capitata
“Peach” variety
- Size: Medium (4-6 inches)
- Features: Rosette shape, leaves turn peachy-pink before blooming
- Care level: Easy, tolerates more sun than other varieties
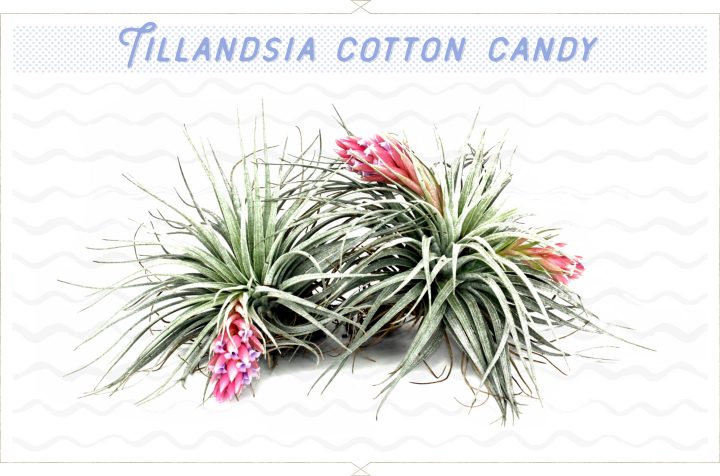
Tillandsia ‘Cotton Candy’
Popular hybrid variety
- Size: Small to medium (3-5 inches)
- Features: Soft, silvery leaves with pink blooms
- Care level: Easy, good for beginners
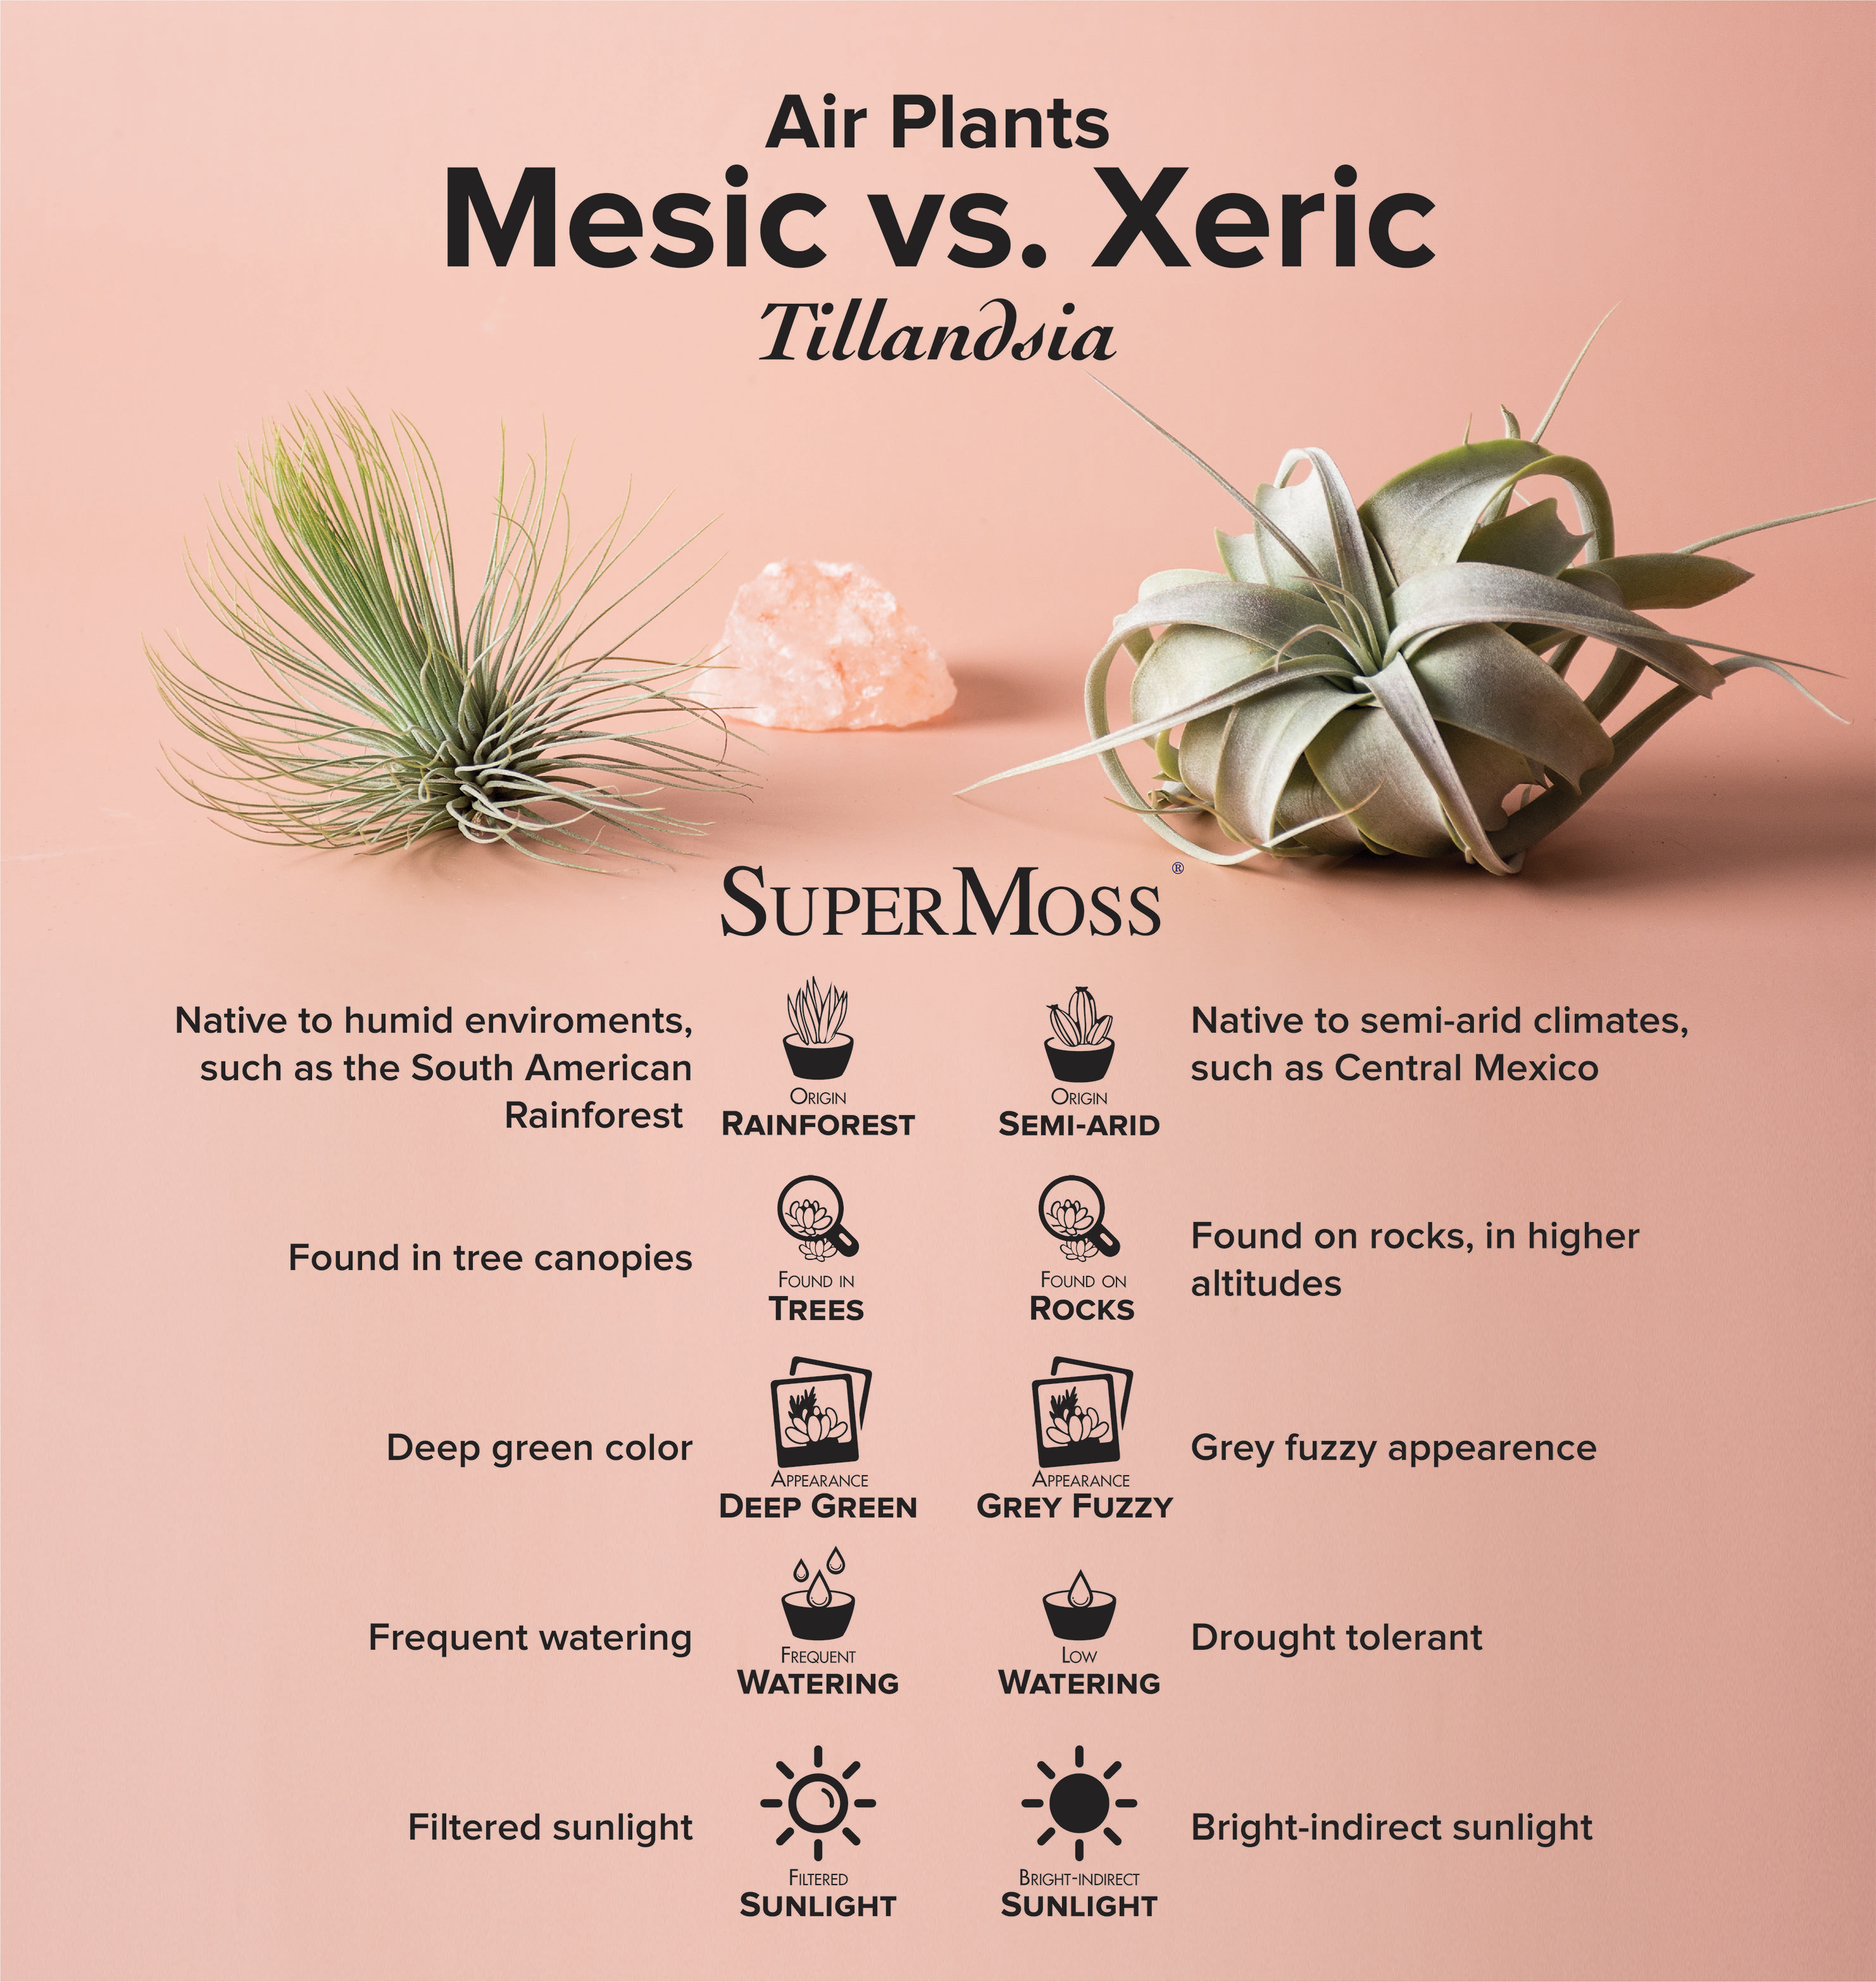
Xeric vs. Mesic Air Plants
Xeric Types
Xeric air plants grow in drier environments and have developed adaptations to survive with less water:
- More pronounced trichomes (giving a silvery appearance)
- Usually thicker, more rigid leaves
- Require less frequent watering
- Examples: T. xerographica, T. tectorum, T. harrisii
Mesic Types
Mesic air plants come from more humid, tropical environments:
- Greener, smoother leaves with fewer visible trichomes
- Often softer, more pliable leaves
- Require more frequent watering
- Examples: T. bulbosa, T. butzii, T. brachycaulos
Common Problems & Solutions
Even with proper care, air plants can sometimes develop issues. Being able to identify problems early will help you save your plants. Here are common issues and how to address them:
Overwatering & Rot
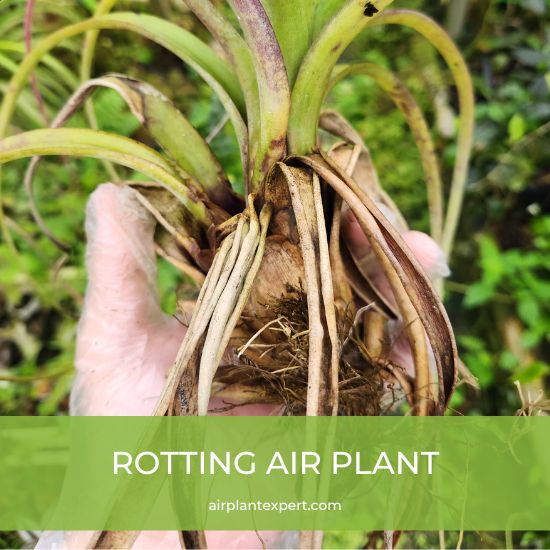
Signs:
- Black or dark brown base
- Leaves falling out from center
- Foul smell
- Soft, mushy texture at base
Solutions:
- Remove affected/rotting parts with clean scissors
- Allow to dry thoroughly
- Reduce watering frequency
- Ensure better air circulation after watering
Dehydration & Drying Out
Signs:
- Curling, wrinkled leaves
- Brown, crispy leaf tips
- Leaves folding in more than usual
- Dull, lackluster appearance
Solutions:
- Soak in water for up to 1 hour
- Increase watering frequency
- Consider relocating to more humid environment
- Shield from excessive heat or direct sun
Sunburn
Signs:
- Bleached or whitened patches
- Dry, crispy areas (especially on side facing light)
- Brown scorched spots
Solutions:
- Move plant to a location with filtered light
- Provide shade during intense midday sun
- If in terrariums, avoid placing in direct sunlight (glass intensifies heat)
Pest Issues
Common Pests:
- Scale insects (appear as small brown bumps)
- Mealybugs (white cottony masses)
Solutions:
- Isolate affected plants immediately
- Gently wash with insecticidal soap solution
- Remove visible pests with cotton swab dipped in alcohol
- Rinse thoroughly and allow to dry completely
Preventative Care Tips:
- Regular inspection is key—look at your plants weekly while watering
- Maintain good air circulation at all times
- Quarantine new plants for 1-2 weeks before introducing to your collection
- Use the right water type and ensure proper drying after soaking
- Fertilize monthly with air plant-specific fertilizer (at 1/4 strength)
Creative Display Ideas
One of the most appealing aspects of air plants is their versatility in display options. Since they don’t need soil, you can showcase them in countless creative ways:
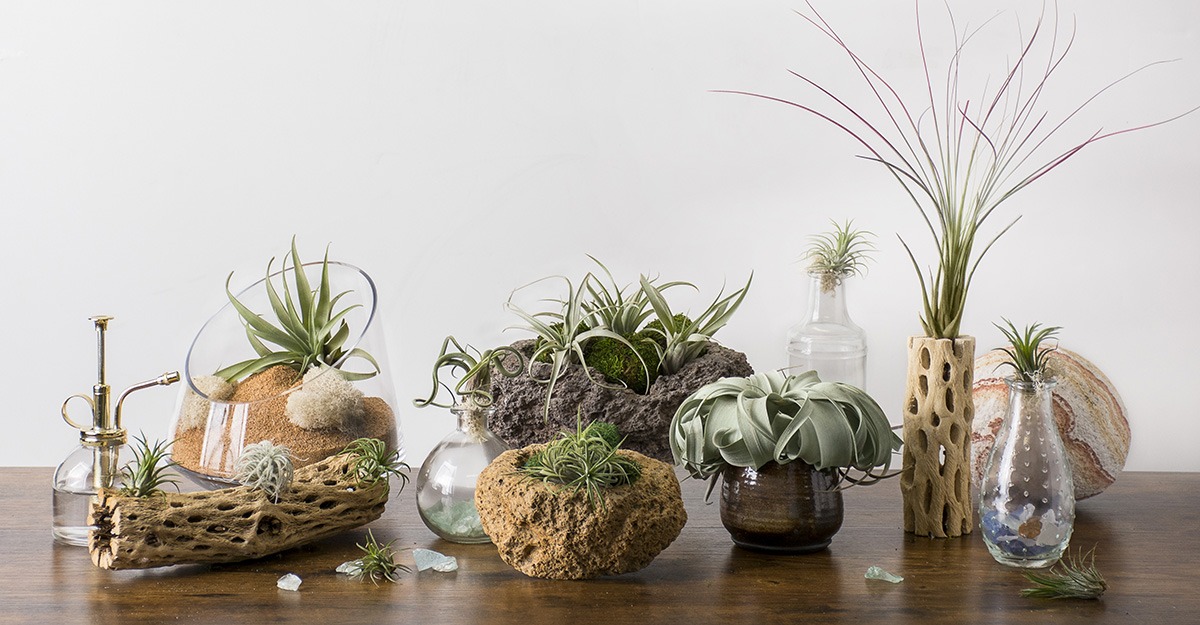
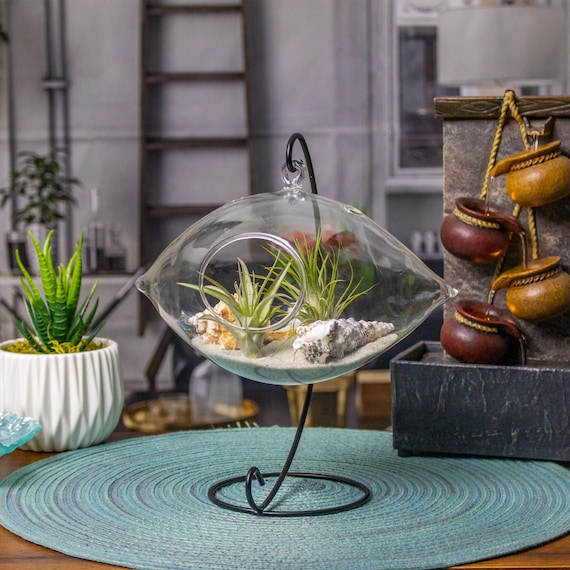
Hanging Glass Terrariums
Suspended glass globes create an ethereal display for air plants. Look for terrariums with openings large enough to ensure good air circulation.
Display tip: Add colorful sand, sea glass, or small pebbles to the bottom of the terrarium for added visual interest. Hang at different heights for a dynamic arrangement.
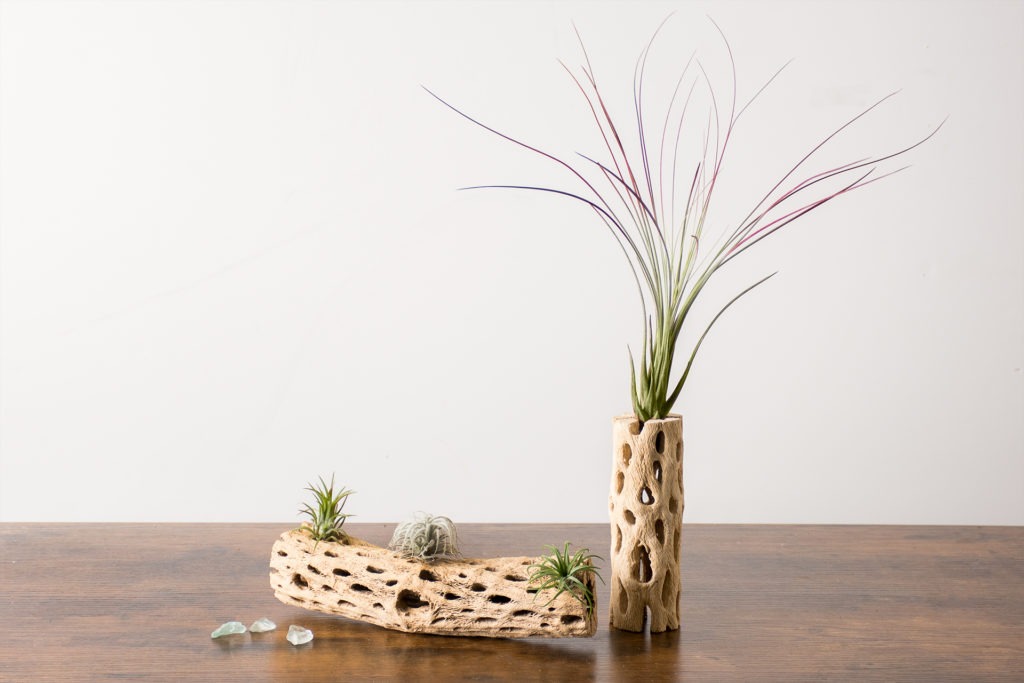
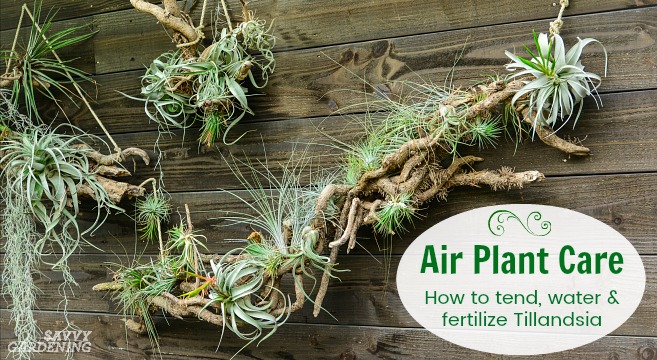
Natural Wood Mounts
Cholla wood, driftwood, and grapevine create naturalistic displays that mimic how air plants grow in the wild.
Display tip: Secure plants with fishing line or waterproof glue (like E-6000). Avoid copper wire which can harm plants. For a woodland look, add small patches of reindeer moss.
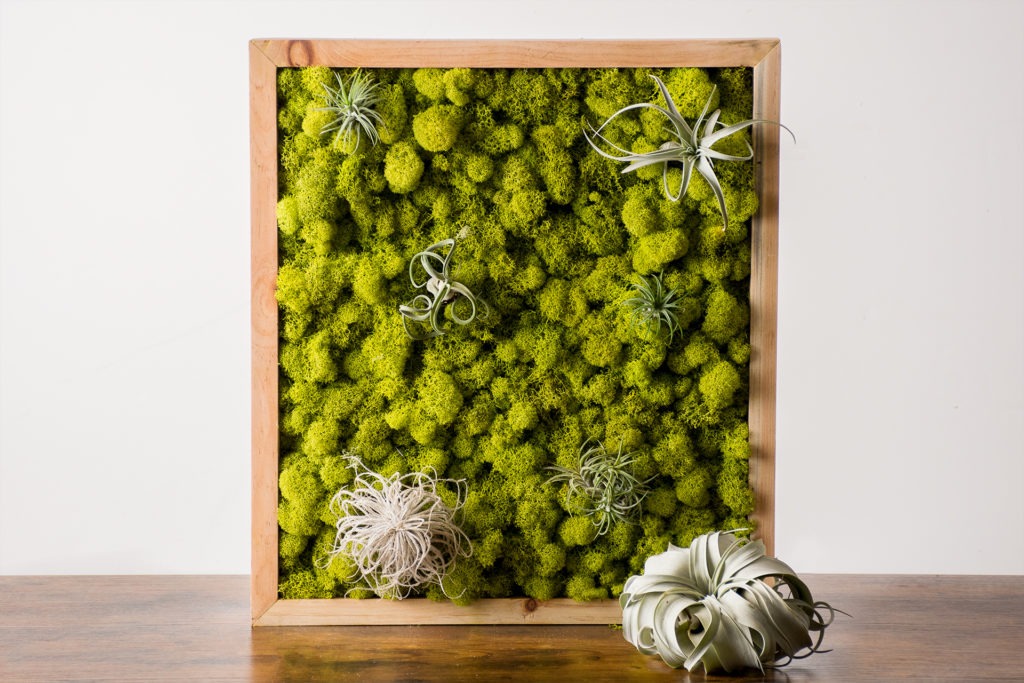
Living Wall Displays
Create a stunning vertical garden by combining preserved moss with air plants for a modern biophilic design element.
Display tip: Use preserved reindeer moss as a base and attach air plants with floral pins. Occasionally remove plants for watering.
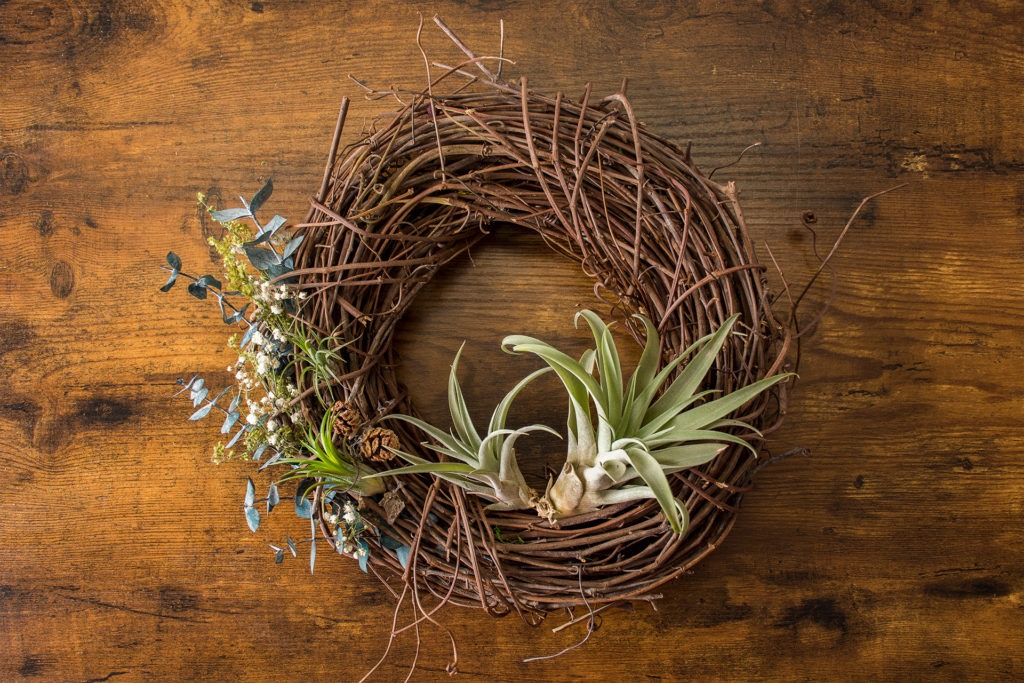
Living Wreaths
Grapevine wreaths provide the perfect natural base for creating a living air plant wreath that can be displayed indoors year-round.
Display tip: Combine different sizes and varieties of air plants with dried flowers or eucalyptus for texture and visual interest. For watering, gently mist or carefully remove plants to soak.

Driftwood Sphere
A sculptural display creating visual interest from all angles.
Seashell Terrarium
A coastal-inspired display combining ocean elements with air plants.

Wood Base Terrarium
Combines natural wood with glass for a modern, earthy display.
Mounting & Attaching Air Plants
Recommended Methods:
- E-6000 glue – Waterproof and non-toxic when dry
- Hot glue – Allow to cool for 5 seconds before attaching plant
- Fishing line or thread – Invisible attachment method
- Floral wire (non-copper) – Good for temporary displays
Avoid These Methods:
- Copper wire – Toxic to air plants
- Super glue – Can damage plant tissue
- Nails/staples through fleshy parts – Use only on woody stolons
- Completely enclosing in moss or other material
Growth Cycle & Reproduction
Understanding the Air Plant Life Cycle
Air plants have a unique life cycle that differs from most houseplants. Each plant will bloom once in its lifetime, then produce offsets (pups) before eventually dying.
Young offset growing from mother plant
3-5 years of vegetative growth
Produces flowers (once in lifecycle)
Produces 2-8 offspring
Mother plant gradually dies
Flowering Process
Most air plants bloom at some point between winter and summer. The blooming process begins with a bloom spike (inflorescence) emerging from the center of the plant. Flowers can last from days to months depending on the species. While beautiful, the blooming process signals that the plant is reaching the end of its lifecycle.
Propagating Air Plants
The main method of propagation is through pups (offsets). After blooming, most air plants will produce 2-8 pups from their base.
How to Separate Pups:
- Wait until the pup is at least 1/3 to 1/2 the size of the mother plant
- Hold both the mother and pup at their bases
- Gently twist in a downward motion to separate
- If resistance is felt, use clean scissors to cut as close to the mother plant as possible
- Care for the pups as you would adult plants, but they may need slightly more frequent misting
Note: Don’t discard the mother plant after it produces pups! As long as it still has healthy leaves, it may continue to produce more pups over several years.
Air plant showing colorful bloom spike
Air plant with multiple pups growing from base
Air Plant Care Summary
Essential Care Checklist
Water
Soak 20-30 minutes weekly; dry completely within 1-3 hours
Light
Bright, indirect light; avoid direct sun
Air Circulation
Good airflow essential; avoid enclosed containers
Temperature
50-90°F (10-32°C); protect from frost
Fertilizer
Monthly with bromeliad fertilizer at 1/4 strength
Air Plant Success Tips
- Start with easier varieties like Tillandsia ionantha or T. capitata if you’re a beginner
- Monitor your plants closely after first bringing them home to establish the right watering schedule for your environment
- Group air plants together to create higher humidity microenvironments
- Get to know different species—some prefer more water (mesic types) while others prefer less (xeric types)
- Let blooming happen naturally—don’t try to force it with excessive fertilizer