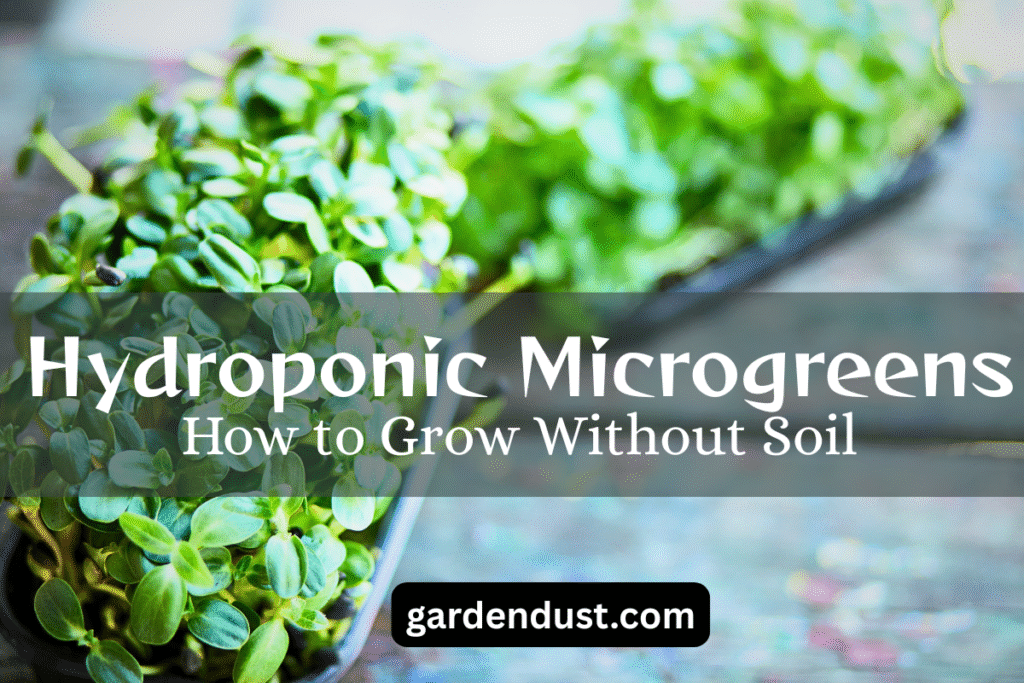
Microgreens—those tiny, nutrient-rich greens harvested just after sprouting—have become popular in homes, restaurants, and urban farms. Traditionally grown in soil, these delicate greens are now frequently cultivated using hydroponics—a soilless growing technique that offers cleaner results, faster harvests, and often higher yields.
In this in-depth guide, we’ll walk you through everything you need to know about hydroponic microgreens, including their benefits, required equipment, best practices, nutrient solutions, common mistakes, and how to set up your own hydroponic system at home.
What Are Hydroponic Microgreens?
Hydroponic microgreens are baby plants grown without soil, using only water, light, and a nutrient solution. Instead of relying on organic soil, the seeds are placed on a sterile growing medium—like coco coir mats, grow pads, or mesh screens—where they germinate and grow until harvested.
These crops are harvested young—usually 7 to 21 days after germination—when they have developed their first set of true leaves, making them flavorful, tender, and packed with nutrients.
Benefits of Growing Microgreens Hydroponically
Hydroponics offers many advantages over traditional soil-based growing, especially in indoor or small-scale settings. Here’s why hydroponic microgreens are becoming a favorite:
1. Cleaner Harvest-Without soil, there’s no risk of dirt clinging to leaves. This makes harvesting easier and more sanitary—perfect for direct kitchen use or commercial sale.
2. Faster Growth-Hydroponics provides plants with direct access to water and nutrients, speeding up germination and overall growth. You can often harvest 1–3 days sooner than soil-grown microgreens.
3. Space Efficient-Hydroponic systems can be stacked vertically, making them ideal for urban growers with limited space.
4. Water Saving-Hydroponic systems use up to 90% less water than soil-based growing because of their closed-loop design.
5. Reduced Risk of Pests and Diseases-Without soil, there’s less chance of mold, fungus gnats, and soil-borne diseases like damping-off.
6. No Weeds-Since there’s no soil, weeds can’t take hold. Your microgreens face no competition for nutrients or light.
Disadvantages of Hydroponic Microgreens
While hydroponics offers many benefits, it’s not without its challenges. Here are a few drawbacks to consider:
- Initial Setup Costs: Trays, mats, and nutrient solutions can be more expensive upfront than soil.
- Nutrient Dependency: Microgreens don’t need much, but they still require precise nutrient balancing.
- Learning Curve: Maintaining pH, light levels, and moisture requires monitoring.
- Limited for Certain Varieties: Larger microgreens like sunflowers and peas may perform better in soil.
What You Need to Grow Hydroponic Microgreens
Setting up a hydroponic system doesn’t have to be expensive or complex. Here’s what you’ll need:
1. Seeds
Choose high-quality, untreated microgreen seeds. Some common hydroponic varieties include:
- Broccoli
- Radish
- Kale
- Mustard
- Arugula
- Kohlrabi
- Cabbage
- Basil
Avoid sunflower and pea microgreens at first—they perform better in soil or require more support.
2. Growing Trays
Shallow trays (1–2 inches deep) are ideal. You’ll need:
- A bottom tray (no holes) to hold water
- A top tray (with holes) or mesh to support the grow medium and allow root access
- Many hydroponic growers also use no-hole trays with grow pads placed directly on the tray.
3. Growing Medium (Soilless Substrate)
Common hydroponic mediums include:
- Hemp mats – Biodegradable, retains moisture well
- Coco coir mats – Renewable, mold-resistant, and affordable
- Jute pads – Natural, breathable, and moisture-retaining
- Bamboo mats – Sustainable and sterile
- Synthetic grow pads (polyester or nylon) – Reusable but not biodegradable
- Micro-mesh screens or sieves – For root-suspension systems
- Avoid using paper towels or cotton wool, as they break down or retain too much moisture.
4. Light Source
Microgreens require 12–16 hours of light daily. Options include:
- LED grow lights (full spectrum preferred)
- Fluorescent tubes (T5)
- Natural light (if near a bright window)
5. Water-Use filtered or distilled water if possible to avoid chlorine and excess minerals. Water quality is crucial in hydroponics since it’s the main medium.
6. Nutrient Solution (Optional)-Since microgreens are harvested early, many varieties don’t require added nutrients beyond what’s in the seed. However, for longer-growing microgreens or repeated harvests, you can use a diluted hydroponic nutrient mix.
Choose a balanced liquid fertilizer with an NPK ratio like 2-2-2 or 4-4-4, and apply at ¼ strength.
7. pH Testing Kit (Optional)-The ideal water pH for microgreens is 5.5–6.5. You can use pH strips or digital meters to monitor and adjust using natural pH up/down solutions.
Step-by-Step Guide: How to Grow Hydroponic Microgreens
Follow these steps to grow your first batch of microgreens without soil:
Step 1: Sanitize Your Trays and Workspace-Cleanliness is crucial in hydroponics. Wash trays with soap and water, then sanitize using vinegar or a diluted bleach solution. Rinse thoroughly.
Step 2: Soak the Seeds (if needed)-Some seeds, like radish or broccoli, don’t need soaking. Larger seeds like peas or sunflowers (if used) benefit from 6–8 hours of soaking to improve germination.
Step 3: Prepare the Growing Medium-Place your grow mat (e.g., hemp, coir, jute) inside your tray. Moisten it evenly with filtered water—don’t drench it. It should be damp like a wrung-out sponge.
Step 4: Sow the Seeds-Evenly scatter seeds across the surface. Avoid overlapping too much to prevent mold. Press seeds gently into the mat so they make contact but remain uncovered.
Step 5: Cover for Germination-Use another tray or a humidity dome to cover the seeded tray. This creates darkness and retains moisture. Keep the tray in a warm place (~70°F or 21°C) for 2–4 days, depending on the variety.
Step 6: Uncover and Provide Light-Once the seeds sprout and begin to “reach,” remove the lid and place the tray under grow lights or near a bright window. Ensure 12–16 hours of light daily.
Step 7: Water as Needed-Water from the bottom tray to avoid splashing leaves and stems. Keep the grow mat moist but not soaked. Refill every 1–2 days as needed.
Step 8: Optional – Add Nutrients-If you choose to supplement, add diluted nutrient solution to the bottom tray once the true leaves appear (typically day 5–7). Avoid overfeeding.
Step 9: Harvest-Most hydroponic microgreens are ready to harvest between 7 to 14 days after germination. Use scissors to cut just above the mat level. Rinse gently and dry before use.
Best Microgreens for Hydroponic Growing
While many microgreens thrive in hydroponic conditions, some are particularly well-suited:
| Microgreen | Germination Time | Harvest Time | Notes |
| Broccoli | 1–2 days | 8–10 days | Fast grower |
| Radish | 1–2 days | 6–8 days | Peppery flavor |
| Mustard | 1–2 days | 6–10 days | Spicy kick |
| Cabbage | 2–3 days | 8–12 days | Mild flavor |
| Kale | 2–3 days | 8–12 days | Nutrient-dense |
| Arugula | 2–3 days | 10–14 days | Bold, nutty |
| Basil | 3–5 days | 12–18 days | Prefers warmth |
Avoid using large-seeded varieties like sunflower or pea unless you’re using a stronger medium like coconut coir or a grow plug tray.
Tips for Success with Hydroponic Microgreens
Here are some expert tips to help you get better results:
1. Avoid Overwatering-Too much water leads to mold and root rot. Keep mats damp—not soaked.
2. Monitor Humidity-High indoor humidity (above 70%) can encourage mold. Use fans for airflow.
3. Keep It Clean-Always wash your trays and sanitize your space between harvests.
4. Watch for Mold-Mold appears as fuzzy white growth on mats. Reduce moisture, increase airflow, and remove any affected sections.
5. Use Blackout Domes Carefully-Too long under a blackout dome can lead to leggy, pale seedlings. Remove once seeds sprout.
6. Try Bottom Watering-This method reduces splashing and limits bacterial or fungal issues.
7. Stagger Your Batches-Start a new tray every few days for continuous harvests.
Reusing Hydroponic Grow Mats: Can You Do It?
Some grow mats (like synthetic ones) can be reused if properly sanitized. However, natural mats like jute or hemp break down and are best composted after one use. If you want to reuse mats:
- Remove all roots and plant debris
- Soak in vinegar or hydrogen peroxide solution
- Rinse thoroughly and air dry
- For safety, most growers use fresh mats each cycle to prevent contamination.
How to Store and Use Hydroponic Microgreens
Once harvested:
- Rinse lightly to remove seed hulls or debris
- Dry thoroughly using a salad spinner or paper towels
- Store in an airtight container in the fridge
- Hydroponic microgreens stay fresh for 5–7 days if properly stored.
Use them in:
- Salads
- Sandwiches
- Wraps
- Smoothies
- Garnishes
- Soups and stir-fries (add at the end to preserve texture)
Troubleshooting Common Problems
| Problem | Cause | Solution |
| Mold on mats | High humidity, poor airflow | Improve ventilation, reduce watering |
| Uneven germination | Dry spots, uneven seed spread | Mist evenly, spread seeds uniformly |
| Leggy microgreens | Low light, too long in darkness | Add grow lights, remove blackout sooner |
| Yellow leaves | Lack of light or nutrients | Increase light or add nutrients |
| Smelly trays | Root rot from overwatering | Let mats dry between watering |
Final Thoughts
Hydroponic microgreens offer an innovative, clean, and efficient way to grow fresh greens year-round—without soil. Whether you’re a beginner or a seasoned gardener, hydroponics can open the door to fast harvests, fewer pests, and a satisfying indoor gardening experience.
By understanding your seed variety, choosing the right grow medium, maintaining moisture, and supplying adequate light, you’ll be well on your way to producing vibrant, flavorful greens every week. Whether you want a fresh addition to meals, a side business, or a healthy hobby, hydroponic microgreens are a rewarding endeavor. Happy Gardening….