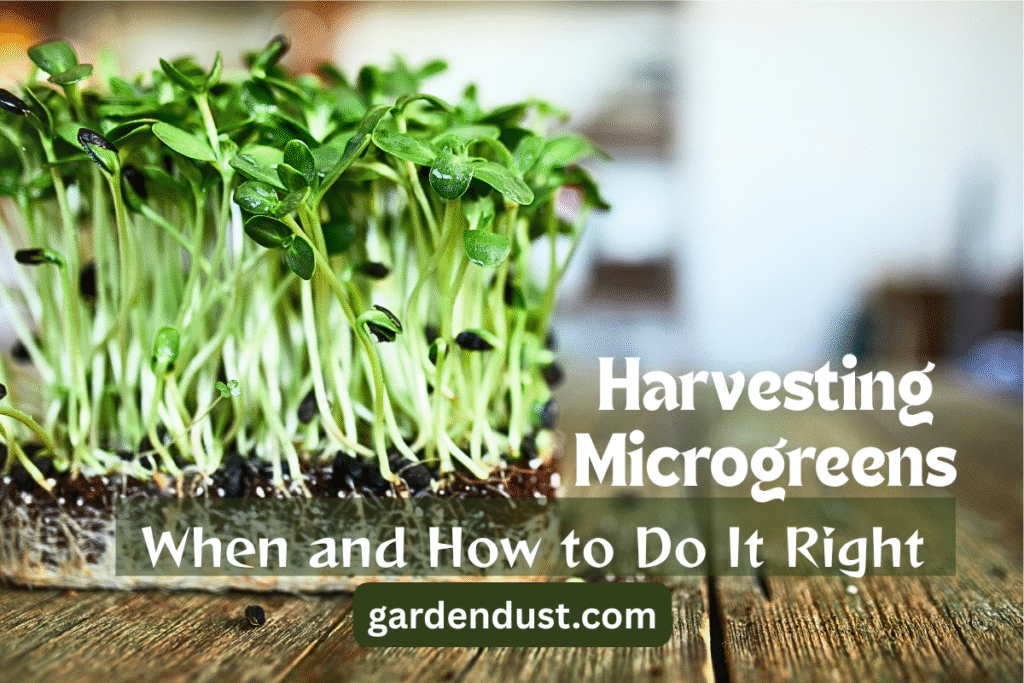
Microgreens are one of the most nutrient-dense and flavorful crops you can grow at home. These tiny greens, typically harvested just after their first true leaves appear, are not only delicious but also packed with vitamins and antioxidants. Whether you’re growing them for home use or commercial purposes, understanding the correct way and time to harvest microgreens is essential to ensure the best flavor, texture, and nutrient content.
In this comprehensive guide, we’ll explore everything you need to know about harvesting microgreens: how to tell when they’re ready, step-by-step harvesting techniques, the tools you’ll need, post-harvest care, common mistakes to avoid, and how to extend your harvest for successive yields.
1. Understanding Microgreens and Their Growth Stages
Before diving into harvesting techniques, it’s important to understand the basic stages of microgreen development:
- Germination Stage: Seeds absorb moisture, swell, and sprout. This stage takes 1–4 days, depending on the type of seed.
- Cotyledon Stage: The first set of leaves to appear (seed leaves) emerge from the soil. Microgreens can technically be harvested at this stage.
- True Leaf Stage: The first set of “true leaves” (the ones that resemble the adult plant) emerges above the cotyledons. This is generally considered the optimal time for harvesting most microgreens.
- Mature Stage: If not harvested, microgreens continue to grow into baby greens and then mature plants, which are not ideal for microgreen harvesting.
2. When to Harvest Microgreens: Timing Matters
Harvesting at the right time is critical for flavor, texture, and nutritional value.
General Harvest Window
Most microgreens are ready for harvest:
- 7 to 21 days after sowing
- When they’re 2–4 inches tall
- When the first true leaves have appeared
Signs Microgreens Are Ready
- Uniform Height: Microgreens appear tall, upright, and consistent in height.
- Bright Color: Leaves are vibrant green (or red/purple for varieties like amaranth or beet).
- True Leaves Emerged: One or two true leaves have appeared, in addition to the cotyledons.
- Pleasant Aroma: They smell fresh and green, not musty or sour.
Plant-Specific Harvest Timelines
| Microgreen Type | Harvest Time | Height at Harvest |
| Radish | 6–10 days | 2–3 inches |
| Sunflower | 7–12 days | 3–4 inches |
| Broccoli | 8–12 days | 2–3 inches |
| Basil | 14–21 days | 2 inches |
| Cilantro | 16–20 days | 2–3 inches |
| Pea Shoots | 10–14 days | 4–6 inches |
3. Tools You’ll Need for Harvesting
While harvesting microgreens doesn’t require heavy equipment, having the right tools ensures a clean, efficient process:
- Sharp scissors: Ideal for home growers; they offer control and precision.
- Harvest knife or serrated blade: Better for larger trays or commercial harvesting.
- Cutting board or clean tray: To collect your harvested greens.
- Sanitizer spray: To clean tools before harvesting, minimizing contamination.
- Paper towels or cloths: For drying microgreens if rinsed post-harvest.
Tip -Always sanitize your tools before and after use to prevent disease and mold.
4. How to Harvest Microgreens (Step-by-Step)
Here’s how to properly harvest microgreens to maintain their quality:
Step 1: Prepare for Harvest
- Choose a cool time of day, preferably morning, when the greens are crisp.
- Avoid watering the crop for 8–12 hours before harvest. This reduces moisture, making cutting easier and prolonging shelf life.
Step 2: Sanitize Your Tools
- Wipe your scissors or knife with a sanitizer (like 70% isopropyl alcohol).
- Wash your hands thoroughly or wear gloves to reduce contamination risk.
Step 3: Identify the Cut Line
- Grasp a small bunch of microgreens gently.
- Cut just above the soil line—about ½ inch to 1 inch from the base—without pulling the roots.
Step 4: Collect Carefully
Lay the harvested greens in a clean tray or on paper towels. Avoid stacking too high, which can cause bruising or compression.
Step 5: Optional Rinse
- If you suspect soil or dust, lightly rinse in cold water and dry using a salad spinner or by patting gently with paper towels.
- For home use, rinsing is often optional if cleanliness has been maintained.
Step 6: Store Properly
- Store microgreens in an airtight container lined with a dry paper towel.
- Refrigerate immediately at 4–7°C (39–45°F).
- Consume within 5–7 days for optimal freshness.
5. Post-Harvest Handling and Storage
Proper handling after harvesting can significantly impact the quality and shelf life of your microgreens.
Drying-
- Ensure microgreens are completely dry before storing.
- Even slight moisture can lead to rot or bacterial growth.
Refrigeration Tips-
- Use containers that allow a bit of airflow.
- Avoid storing near ethylene-producing fruits (like apples or bananas), which can accelerate spoilage.
- Label containers with the harvest date.
Best Storage Containers
- Clamshell packaging
- Glass or BPA-free plastic containers with lids
- Reusable produce bags lined with paper towels
6. Can You Harvest Microgreens More Than Once?
This is a common question for new growers. The answer depends on the type of microgreen:
- Single-Harvest Varieties
Most microgreens (e.g., radish, arugula, broccoli, sunflower) are cut-and-done crops. Once harvested, they don’t regrow.
- Regrow-Capable Varieties
Some varieties may offer a second, smaller harvest:
- Pea Shoots
- Wheatgrass
- Certain legumes
However, second harvests are usually less tender and less flavorful. If you plan to grow continuously, it’s better to reseed.
7. Common Harvesting Mistakes to Avoid
Here are pitfalls to watch out for when harvesting microgreens:
❌ Harvesting Too Early-Harvesting before the true leaves appear often results in less flavor and nutrition.
❌ Cutting Too Low-Cutting into the soil line can introduce dirt and microbes, increasing the risk of contamination.
❌ Harvesting When Wet-Moist greens are more susceptible to spoilage. Always harvest when dry.
❌ Overhandling-Rough handling can bruise tender greens. Be gentle and avoid compressing them.
❌ Poor Tool Hygiene-Using dirty or dull tools can cause ragged cuts and introduce disease.
8. How to Plan for Continuous Harvests
- If you want a steady supply of microgreens, consider succession planting.
- Succession Planting Schedule
- Start a new tray every 2–4 days, depending on the growth rate of your chosen varieties.
- Mix fast and slow-growing varieties to stagger harvests.
Tips for Efficient Rotation
- Label trays with sowing and expected harvest dates.
- Use different shelf levels or spaces to manage young, mid, and mature trays.
9. Harvesting for Commercial Sale
For growers selling microgreens, precision and cleanliness are vital.
Best Practices
- Harvest in a sanitized environment.
- Use food-safe gloves and containers.
- Package in labeled, sealed containers with harvest dates and variety names.
- Keep a harvest log for traceability and quality control.
- Packaging Ideas
- Biodegradable clamshells or containers
- Vacuum-sealed bags (short-term)
- Branding stickers and harvest notes
10. Composting the Roots After Harvest
Once microgreens are harvested, you’re left with a tray of roots and growing medium.
Can You Reuse the Soil?
It’s not recommended to reuse the soil for microgreens due to root density and potential mold.
However, the spent medium can be:
- Composted
- Used as mulch in outdoor gardens
- Added to worm bins
- Make sure you remove any leftover seeds or moldy patches before composting.
11. Harvesting Microgreens Indoors vs. Outdoors
While the basic technique is the same, there are some key differences:
| Factor | Indoor Harvesting | Outdoor Harvesting |
| Light Conditions | Controlled (grow lights/sunlight) | Variable (sunlight intensity varies) |
| Sanitation | Easier to control | More exposure to pests and soil microbes |
| Weather Effects | Minimal | Rain, wind, or pests can affect timing |
Tools Needed Scissors/knife Same.
If you’re growing outdoors, harvest in early morning or evening to avoid wilted greens from direct sun.
12. Conclusion: Harvesting Like a Pro
Harvesting microgreens is a rewarding step in your indoor or small-space gardening journey. By timing the harvest correctly, using the right tools, and following best practices for cutting and storage, you ensure that your microgreens are fresh, safe, and delicious.
Quick Checklist for Successful Harvest
✅ Harvest when true leaves appear
✅ Cut ½ inch above soil with sanitized scissors
✅ Avoid harvesting when wet
✅ Handle gently and store promptly
✅ Compost spent soil, don’t reuse
Whether you’re growing for personal use or for sale, mastering microgreen harvesting helps maximize your yield and enjoy the freshest greens possible. Happy Gardening…
FAQs About Harvesting Microgreens
Q: Can I harvest microgreens earlier for milder flavor?
Yes, harvesting at the cotyledon stage offers milder flavors, though they may be less nutrient-dense.
Q: Do I need to rinse microgreens after harvesting?
If grown cleanly indoors, rinsing may not be necessary. If unsure, a light rinse followed by drying is recommended.
Q: How often should I harvest microgreens?
It depends on your planting schedule. With succession planting, you can harvest new trays every few days.


