Ultimate Guide to Growing Ginger
From Rhizome to Harvest: A Complete Guide
Why Grow Your Own Ginger?
Growing your own ginger at home is a rewarding experience that provides you with fresh, organic ginger right at your fingertips. Ginger (Zingiber officinale) is a versatile plant known for its aromatic, pungent rhizomes that are used in cooking, beverages, and natural remedies.
Health Benefits
- Anti-inflammatory properties
- Helps alleviate gastrointestinal distress
- Boosts immune system
- May help protect against colorectal cancer
- Can reduce nausea and motion sickness
Gardening Benefits
- Save money on store-bought ginger
- Ensure organic growing conditions
- Harvest fresh ginger as needed
- Enjoy the attractive tropical foliage
- Sustainable food production at home

Getting Started: Selecting & Preparing Ginger
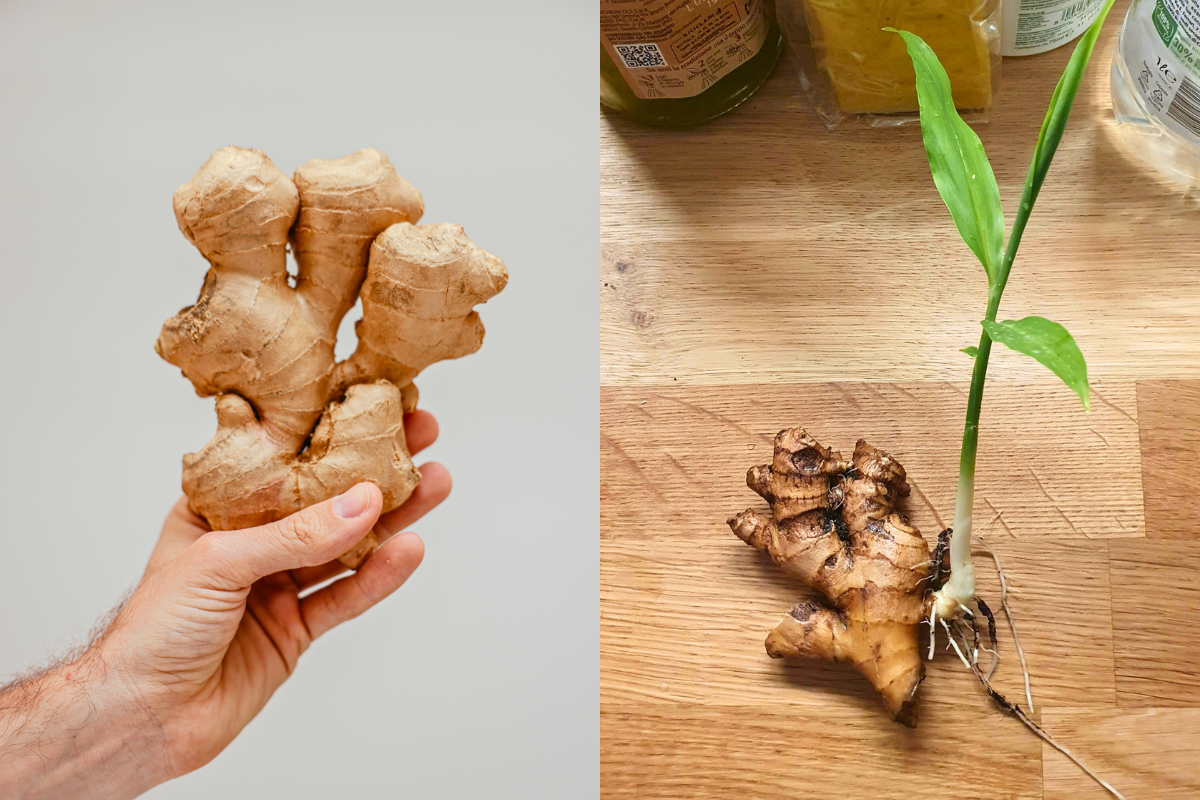
Step 1: Choosing Your Ginger
Look for fresh, plump rhizomes at grocery stores or farmers markets. Choose pieces that:
- Have smooth, tight skin (not wrinkled or dried out)
- Show visible “eyes” or growth buds (small bumps)
- Are firm to the touch, not soft or spongy
- Preferably organic to avoid growth inhibitors
Pro Tip: Organic ginger is ideal as conventional ginger may be treated with growth inhibitors that prevent sprouting.
Step 2: Preparing the Rhizomes
- Soak the ginger in warm water overnight (helps to remove any growth inhibitors)
- Cut larger rhizomes into smaller pieces, 1-2 inches in size
- Ensure each piece has at least one growth bud or “eye”
- Allow cut pieces to dry for 24-48 hours to form a protective callus
Planting Your Ginger
Soil Requirements
Ginger thrives in specific soil conditions:
- Texture: Loose, loamy, and well-draining
- Nutrients: Rich in organic matter
- pH Level: 5.5-6.5 (slightly acidic)
Ideal Soil Mix: Combine 1/3 compost, 1/3 peat moss (or coir), and 1/3 potting soil with a few handfuls of perlite for drainage.
Container Selection
- Choose a wide, shallow container at least 12 inches deep
- Ensure adequate drainage holes
- Ceramic or plastic pots work well
- For multiple rhizomes, use containers with at least 12-16 inches in diameter
Planting Process
- Fill container with prepared soil mix, leaving 2 inches from the top
- Place rhizome pieces with growth buds facing upward
- Plant 2-4 inches deep in the soil
- Space multiple pieces 6-8 inches apart
- Cover with soil and water thoroughly
- Place in a warm location (70-85°F)
Important: Do not overwater after planting. Keep soil moist but not waterlogged to prevent rotting.
Ideal Growing Conditions
Temperature
- Ideal: 70-85°F (21-29°C)
- Minimum: Above 50°F (10°C)
- Protect from cold temperatures
- Bring indoors before first frost
Light
- Outdoors: Partial shade to filtered sunlight
- Indoors: Bright, indirect light
- Avoid harsh, direct sunlight
- Morning sun with afternoon shade is ideal
Water & Humidity
- Keep soil consistently moist
- Water when top inch of soil feels dry
- Avoid waterlogged conditions
- Prefers high humidity (50-70%)
- Mist foliage regularly in dry environments
Climate Note: In cooler zones (below 8), grow ginger as an annual or bring containers indoors for winter. Ginger needs a long, warm growing season of about 8-10 months to develop well.
Growth Stages & Timeline
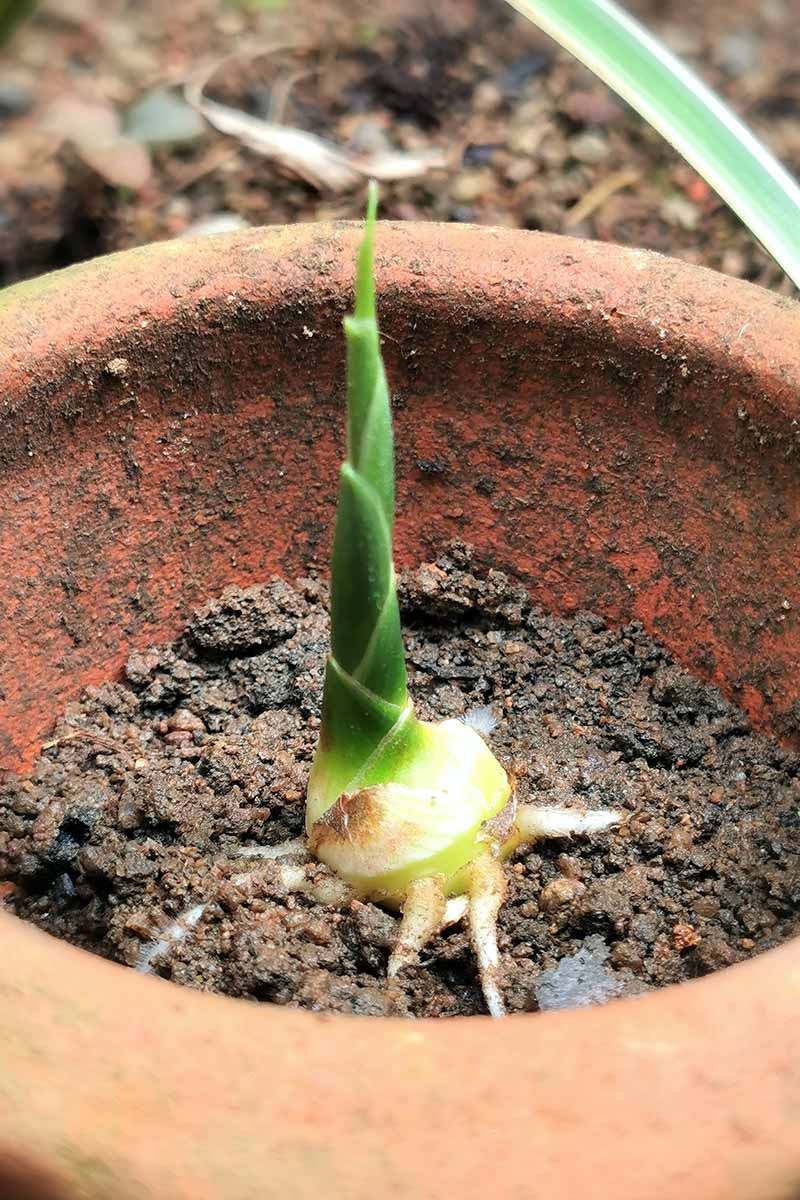
Stage 1: Sprouting (2-3 weeks)
After planting, ginger will take 2-3 weeks to show first signs of growth. Small green shoots will emerge from the soil. Be patient, as sprouting can sometimes take longer depending on conditions.
Stage 2: Early Growth (1-2 months)
The plant develops its first true leaves and begins establishing its root system. During this stage, the plant is delicate and needs consistent moisture.
Stage 3: Vegetative Growth (2-5 months)
The plant grows vigorously, producing more stems and leaves. The rhizomes underground begin to develop and expand. This is when the plant benefits from regular fertilizing.
Stage 4: Maturation (6-8 months)
The plant reaches its full height (2-4 feet). Rhizomes continue to develop and store nutrients. Some varieties may produce flowers at this stage.
Stage 5: Harvest (8-10 months)
The plant may begin to yellow and die back naturally. This signals that the rhizomes are fully developed and ready for harvest.
Maintenance & Care
Fertilizing
- Start fertilizing once shoots are 3-4 inches tall
- Use balanced liquid fertilizer (10-10-10) monthly
- Consider fish emulsion or compost tea for organic options
- Reduce feeding as fall approaches and plants mature
Mulching
- Apply 1-2 inches of organic mulch around plants
- Helps retain moisture and suppress weeds
- Good options: straw, coconut coir, or composted leaves
- Keep mulch away from direct contact with stems
Pruning & Maintenance
- Remove yellowing or dead leaves as needed
- Support tall stems if they begin to lean
- Consider “hilling” soil around the base as plants grow
Winter Care
- In zones 9 and above: Mulch heavily for winter
- In colder zones: Dig up rhizomes or bring containers indoors before first frost
- Indoor plants: Reduce watering during dormancy
- Maintain minimum 55°F (13°C) for overwintering
Overwintering Tip: If you bring potted ginger indoors for winter, place it in a bright location but reduce watering. The plant may go semi-dormant, which is normal.
Common Problems & Solutions
Yellowing Leaves
Cause: Usually overwatering, poor drainage, or nutrient deficiency
Solution: Allow soil to dry between waterings, ensure proper drainage, and check fertilization schedule.
Rotting Rhizomes
Cause: Excessive moisture and poor drainage
Solution: Remove affected parts, reduce watering, improve drainage, and ensure container has adequate holes.
Stunted Growth
Cause: Insufficient nutrients, space, or sunlight
Solution: Feed with balanced fertilizer, ensure adequate pot size, and adjust light conditions.
Pests (Spider Mites, Aphids)
Cause: Dry conditions, stressed plants
Solution: Increase humidity, spray with water, use insecticidal soap or neem oil for persistent issues.
Bacterial Wilt
Symptoms: Wilting, yellowing of leaves despite adequate watering, stunted growth
Solution: Unfortunately, there’s no cure. Remove and destroy infected plants to prevent spread. Avoid planting ginger in the same soil for several years.
Harvesting Your Ginger
When to Harvest
- Baby Ginger: Can be harvested as early as 4-6 months
- Mature Ginger: Best after 8-10 months of growth
- Visual Cues: When stems begin to yellow and die back
- Seasonal Timing: Typically late fall before first frost
Harvest Tip: For a continuous supply, you can carefully dig around the edges of the plant and break off pieces of rhizome while leaving the main plant intact.
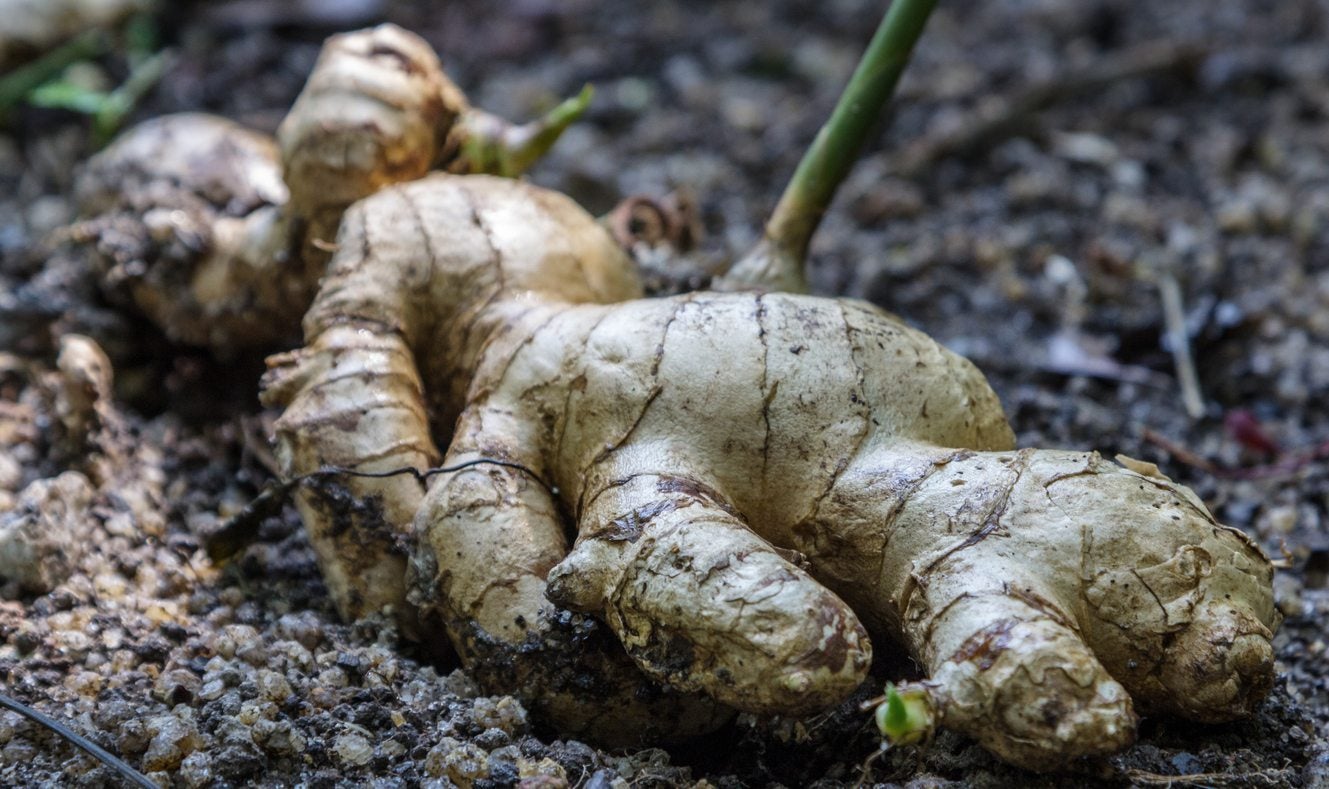
Harvesting Process
- Water the soil to soften it before digging
- Gently loosen soil around the plant with a small trowel
- Carefully dig up the entire plant, starting several inches away from the stems
- Lift the rhizomes out of the soil, being careful not to damage them
- Shake off excess soil and rinse gently with water
- Set aside pieces with good growth eyes for replanting if desired
Post-Harvest Care
- Allow fresh ginger to dry in a warm, well-ventilated area
- Brush off remaining soil when dry
- For storing, cure rhizomes in a warm place for about a week
- Save robust pieces with good growth buds for next season’s planting
Storage & Usage
Fresh Storage
- Refrigerate unwashed in paper towel and plastic bag
- Lasts 3-4 weeks in refrigerator
- Check periodically for signs of mold
Long-Term Storage
- Freeze peeled, thinly sliced ginger
- Preserve in vodka or sherry
- Dry and grind into powder
- Dehydrate thin slices for tea
Culinary Uses
- Fresh: Grate into stir-fries, soups, teas
- Baby ginger: Milder, great for pickling or candying
- Mature ginger: More pungent, ideal for cooking
- Dried: Use as spice in baking and cooking
Usage Tip: Fresh homegrown ginger tends to be more flavorful and juicier than store-bought. You may need to adjust quantities in recipes accordingly!
Continuing the Cycle: Replanting
One of the great benefits of growing ginger is that you can save some of your harvest to plant the following season, creating a sustainable cycle.
Selecting Rhizomes for Replanting
- Choose plump, healthy rhizomes with multiple growth buds
- Look for pieces with well-developed “eyes”
- Avoid wrinkled, soft, or diseased pieces
- Store in a dry, cool (not cold) place until ready to plant again
Sustainability Tip: By saving your own ginger “seed” pieces, you’ll develop a strain that’s particularly well-adapted to your local growing conditions over time.

Your Ginger Growing Calendar
| Month | Activity | Notes |
|---|---|---|
| Early Spring | Prepare and plant rhizomes | After danger of frost has passed, when soil is warm |
| Spring | Monitor sprouting and early growth | Keep consistently moist, provide warmth |
| Summer | Regular fertilizing, maintain moisture | Watch for pests, provide partial shade if needed |
| Late Summer | Continue care, can harvest baby ginger | Selective harvesting possible for early taste |
| Fall | Prepare for harvest as foliage yellows | Reduce watering as plants mature |
| Late Fall | Main harvest before first frost | Store rhizomes appropriately, save some for replanting |
| Winter | Indoor storage of rhizomes for replanting | Keep in cool, dry place until next planting season |
Final Growing Tips
- Patience is key – ginger is a slow-growing crop that rewards those who wait
- In cooler climates, start indoors early to extend growing season
- Keep detailed records of your ginger growing experience to improve each year
- Consider growing ginger alongside turmeric, which has similar requirements
- Experiment with different varieties if you have access to them