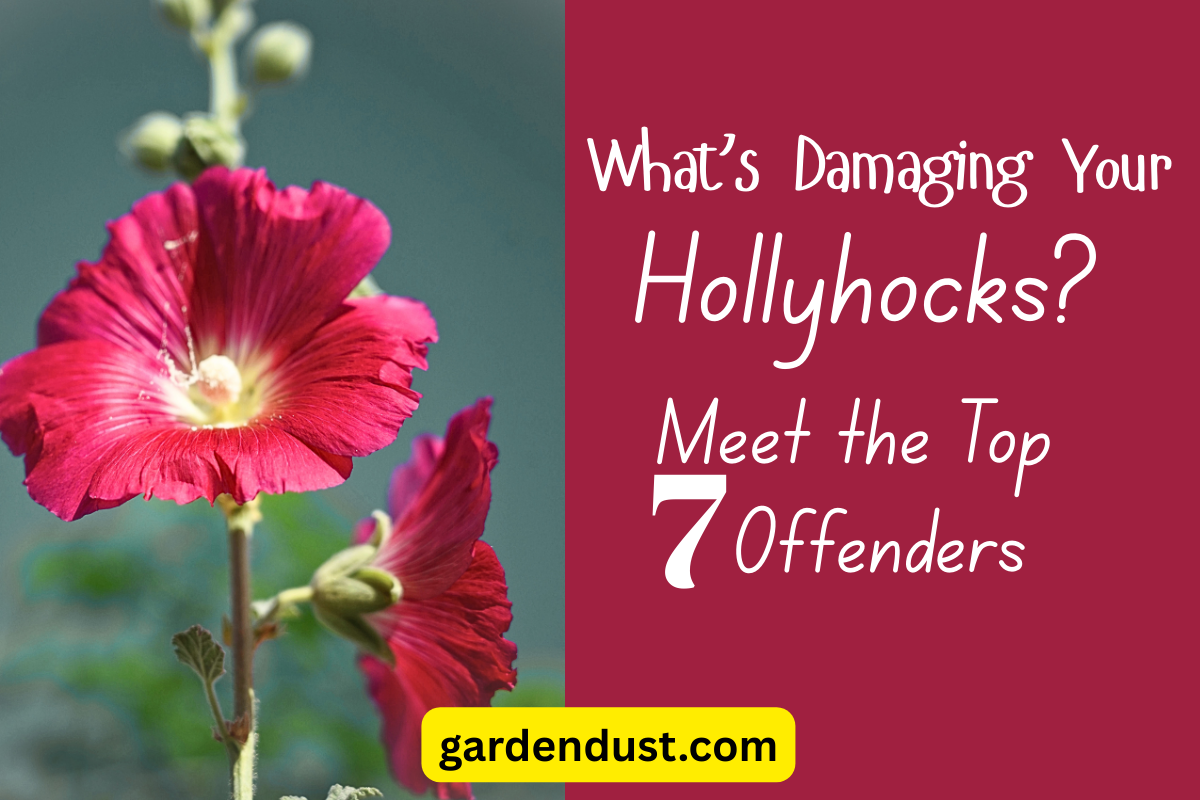
Introduction to Hollyhocks
Hollyhocks (Alcea spp.) are classic cottage garden favorites known for their tall, stately spires adorned with colorful blooms. Part of the mallow family (Malvaceae), hollyhocks bring vertical drama and old-fashioned charm to gardens. With proper care, these impressive plants can reach heights of 6-8 feet, creating stunning backdrops for shorter garden plants.
Key Facts
Type:
Biennial or short-lived perennial
Height:
4-8 feet (1.2-2.4 m)
Bloom Time:
Summer to early fall
USDA Hardiness:
Zones 3-9
Sun Exposure:
Full sun to partial shade
Bloom Cycle:
Often blooms second year after planting
Hollyhocks have a long history in gardens throughout Europe and Asia, with some varieties dating back to the 16th century. Most hollyhocks are biennial, meaning they complete their lifecycle in two years—forming a rosette of leaves in the first year and flowering in the second. However, many modern varieties are short-lived perennials that can bloom for several years, and they often self-seed readily.

Why Grow Hollyhocks?
- Create dramatic vertical interest in garden backgrounds
- Attract important pollinators including bees and butterflies
- Available in a rainbow of colors including white, pink, red, yellow, and near-black
- Low-maintenance once established
- Self-seed readily for continued garden presence
- Perfect for cottage gardens, borders, and against walls or fences
Popular Hollyhock Varieties
With over 80 species in the Alcea genus and countless cultivars, hollyhocks offer a wide range of colors, forms, and growth habits. Here are some outstanding varieties to consider for your garden:
Alcea rosea ‘Chater’s Double’
Densely packed double flowers in various colors including pink, red, white, and yellow. Height: 5-7 feet.
Alcea rosea ‘Mars Magic’
Brilliant scarlet-red single flowers that stand out dramatically. Height: 5-6 feet.
Alcea rosea ‘Halo Series’
Single blooms with contrasting centers in various color combinations. Height: 5-7 feet.
Alcea ficifolia
Fig-leaved hollyhock with distinct foliage and yellow to peach flowers. More rust-resistant than other types. Height: 4-6 feet.
Alcea rosea ‘Nigra’
Striking single flowers in deep burgundy-black, creating dramatic contrast in gardens. Height: 5-6 feet.
Alcea ‘Queeny Series’
Compact dwarf variety (3-4 feet) with double flowers, perfect for smaller gardens or container growing.
Variety Selection Tip:
If hollyhock rust is a concern in your area, consider planting rust-resistant varieties like Alcea ficifolia (fig-leaved hollyhock) or newer hybrid varieties bred for disease resistance.
Planting Hollyhocks
Proper planting is crucial for establishing healthy hollyhocks that will reach their full potential. Follow these guidelines for successful planting:
When to Plant
Spring Planting
Sow seeds directly outdoors about a week before the last expected frost date. Transplant nursery plants after all danger of frost has passed.
Fall Planting
Seeds can be sown in late summer or early fall for blooms the following year. Seeds will germinate and form rosettes before winter dormancy.
Indoor Starting
Start seeds indoors 9-10 weeks before your last frost date. Use deep containers to accommodate their long taproots, and transplant carefully once seedlings are established.
Timing Tip:
Remember that most hollyhocks are biennial, forming a rosette of leaves in the first year and flowering in the second. For continuous blooms, plant new hollyhocks each year.
Where to Plant
Choose the Right Location
Select a spot that receives full sun (at least 6-8 hours daily). In very hot climates, partial afternoon shade may be beneficial. Hollyhocks make excellent backdrop plants against walls, fences, or at the back of garden borders.
Prepare the Soil
Hollyhocks thrive in well-draining, fertile soil with a neutral to slightly alkaline pH. Prepare the planting area by digging to a depth of 12-15 inches and incorporating 2-3 inches of compost or well-rotted manure to improve fertility and drainage.
Spacing Considerations
Plant hollyhocks 18-24 inches apart to allow good air circulation, which helps prevent disease. If planting from seed, thin seedlings to this spacing once they develop their first true leaves.
Planting Depth
Sow seeds ¼ inch deep. When transplanting nursery plants, set them at the same depth they were growing in their containers, with the crown level with the soil surface.
Wind Protection:
Due to their height, hollyhocks benefit from protection against strong winds. Planting near structures or staking tall varieties can prevent stems from breaking.

Hollyhock Care Guide
Hollyhocks are relatively low-maintenance plants once established, but proper care will ensure the healthiest plants and most abundant blooms.
Watering
- New Plants: Keep soil consistently moist until established
- Established Plants: Water deeply once or twice a week during dry periods
- Technique: Water at the base to avoid wetting foliage
- Winter: Reduce watering during dormant period
Hollyhocks have moderate drought tolerance once established, but consistent moisture during the growing season promotes better flowering.
Sunlight & Temperature
- Sunlight: Full sun (6-8 hours daily)
- Partial Shade: Acceptable in hot climates
- Hardiness: USDA Zones 3-9
- Heat Tolerance: Moderate; may need additional water in extreme heat
Insufficient sunlight results in weaker stems and fewer flowers. In very hot regions, afternoon shade can be beneficial.
Fertilizing
- Spring: Apply balanced fertilizer when growth begins
- Growing Season: Light feeding every 4-6 weeks
- Recommended: 10-10-10 balanced fertilizer
- Caution: Avoid over-fertilizing, which promotes foliage at the expense of flowers
Compost applied as mulch provides gentle nutrition and improves soil structure around hollyhocks.
Pruning & Maintenance
- Deadheading: Remove spent flowers to encourage more blooms
- Fall Cleanup: Cut stems to 6 inches after flowering
- Diseased Foliage: Remove promptly to prevent spread
- Support: Stake tall varieties to prevent toppling
For self-seeding, leave some flower stalks intact at the end of the season to allow seed pods to mature and disperse.
Pest Management
- Aphids: Treat with insecticidal soap or strong water spray
- Spider Mites: Increase humidity and use miticides if severe
- Japanese Beetles: Hand-pick or use beetle traps
- Slugs/Snails: Apply diatomaceous earth around plants
Encouraging beneficial insects like ladybugs and lacewings can help control aphid populations naturally.
Disease Prevention
- Hollyhock Rust: The most common disease; characterized by orange pustules on leaf undersides
- Powdery Mildew: White powdery coating on leaves
- Prevention: Good air circulation, proper spacing
- Treatment: Fungicides and removing affected foliage
Watering at the base of plants in the morning helps keep foliage dry, reducing the risk of fungal diseases.
Spotlight on Hollyhock Rust
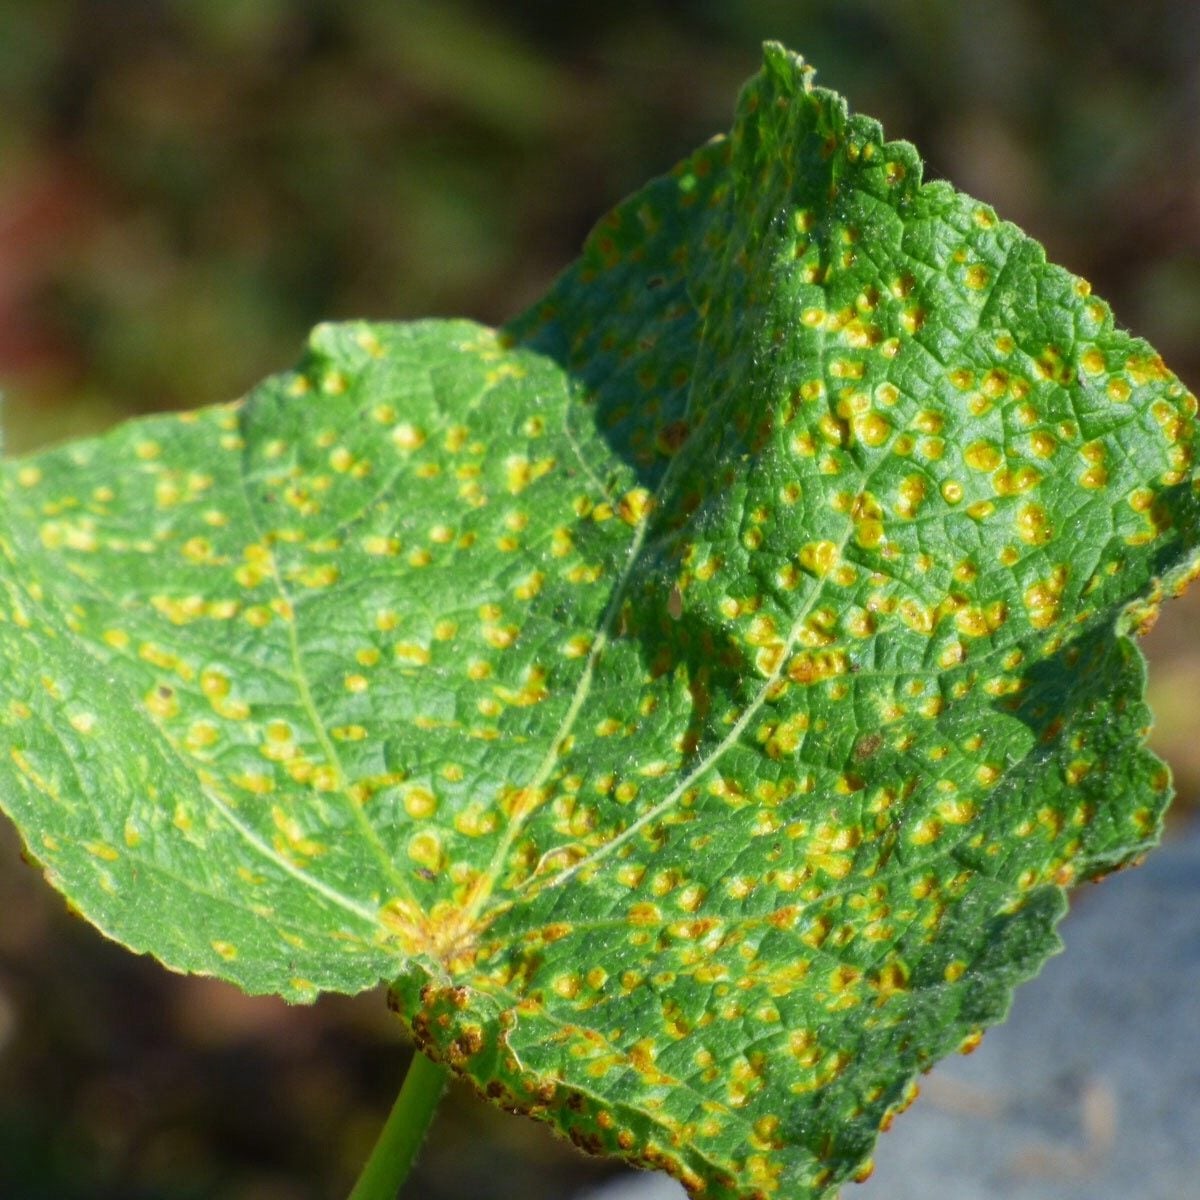
Hollyhock rust (Puccinia malvacearum) is the most common and troublesome disease affecting hollyhocks. It appears as orange-yellow pustules on the undersides of leaves and can eventually cause leaves to yellow, brown, and drop prematurely.
Prevention & Management:
- Space plants properly to ensure good air circulation
- Avoid overhead watering; water at the base in morning hours
- Remove and dispose of infected leaves promptly (do not compost)
- Apply fungicide proactively in early spring before symptoms appear
- Clean up and destroy all plant debris in fall to reduce overwintering spores
- Consider planting rust-resistant varieties like Alcea ficifolia
Propagating Hollyhocks
Hollyhocks can be propagated in several ways, with seed propagation being the most common and reliable method.
Seed Propagation

Collecting Seeds
Allow some flower stalks to remain on plants at season’s end. Seed pods will form and turn brown when mature. Collect pods and dry them further indoors before breaking open to harvest seeds.
Direct Sowing
Sow seeds directly in the garden in late spring or early fall. Plant seeds ¼ inch deep and 18-24 inches apart. Keep soil consistently moist until germination, which typically occurs in 1-2 weeks.
Indoor Starting
Start seeds indoors 9-10 weeks before the last expected frost. Use deep pots or seed trays with at least 2 inches of depth to accommodate developing taproots. Transplant carefully to avoid root disturbance.
Cold Stratification
For better germination rates, some gardeners cold-stratify hollyhock seeds by refrigerating them for 2-4 weeks before planting. This mimics the natural winter conditions that trigger germination in spring.
Other Propagation Methods
Self-Seeding
Hollyhocks are prolific self-seeders. To encourage natural propagation, allow some seed heads to mature and disperse on their own. Seedlings can be transplanted to desired locations when they reach 2-3 inches tall.
Gardener’s Tip: Mark the location of plants with outstanding colors or forms, and allow only these to self-seed if you want to maintain specific characteristics.
Root Division
While less common than seed propagation, some perennial hollyhock varieties can be propagated by root division in early spring or fall:
- Dig up an established plant when it’s dormant
- Carefully divide the root ball into sections, ensuring each has both roots and crown
- Replant divisions at the same depth as the original plant
- Water thoroughly and keep soil moist until new growth appears
Seasonal Care Calendar
Follow this year-round guide to keep your hollyhocks thriving through the seasons.
Spring (March-May)
- March: Remove winter protection; clean up any debris around plants
- April: Apply balanced fertilizer as new growth emerges; sow seeds indoors
- May: Direct sow seeds outdoors; transplant seedlings; install stakes for tall varieties
- Disease Prevention: Begin fungicide applications before rust symptoms appear
- Watering: Keep soil evenly moist as growth accelerates
Summer (June-August)
- June: Monitor for pests and diseases regularly; tie stems to supports as needed
- July: Deadhead spent flowers to encourage more blooms; water deeply during dry periods
- August: Continue deadheading or allow some seed pods to form for collection
- Disease Management: Remove any rust-infected leaves promptly
- Feeding: Apply light feeding in early summer for continued flower production
Fall (September-November)
- September: Collect mature seeds; sow for next year’s plants
- October: Cut spent flower stalks to 6 inches above ground after flowering completes
- November: Clean up all fallen debris to reduce disease problems next season
- Mulching: Apply 2-3 inches of mulch around crown after ground freezes in colder regions
- Watering: Reduce watering as temperatures cool and plants enter dormancy
Winter (December-February)
- December: Ensure winter mulch is in place in cold regions
- January: Plan next season’s garden; order seeds of new varieties
- February: Start seeds indoors in late February for zones 4-6
- Protection: Check mulch after storms or high winds to ensure crowns remain covered
- Research: Research rust-resistant varieties if disease was problematic
Companion Planting & Garden Uses
Hollyhocks are versatile garden plants that serve multiple purposes in the landscape and pair well with many other plants.
Companion Plants
These plants grow well alongside hollyhocks and create attractive combinations:
Mid-Height Companions
- Shasta Daisies: Clean white flowers contrast beautifully with colorful hollyhocks
- Coneflowers (Echinacea): Provide complementary color and attract pollinators
- Salvias: Spiky blue or purple flowers create textural contrast
- Catmint (Nepeta): Soft texture and lavender-blue color add dimension
Shorter Companions
- Lavender: Aromatic foliage and flowers complement hollyhocks’ vertical lines
- Dianthus: Low-growing frilly flowers in complementary colors
- Cranesbill Geraniums: Create ground cover beneath tall hollyhock stems
- Lamb’s Ears: Silvery foliage provides textural contrast
Similar Height Companions
- Foxgloves: Similar vertical growth habit creates a coordinated look
- Delphinium: Tall spires in complementary colors
- Russian Sage: Airy texture contrasts with hollyhocks’ substantial presence
- Verbascum: Similar growth habit with different flower form
Garden Uses
Cottage Gardens
Hollyhocks are quintessential cottage garden plants, bringing height, color, and old-fashioned charm. Plant them along fences, against walls, or as focal points in informal garden beds.
Background Plants
Their impressive height makes hollyhocks excellent backdrop plants for borders. Place them at the back of garden beds where their towering stalks create a dramatic vertical element behind shorter plants.
Screening
Plant a row of hollyhocks to create a seasonal screen or to hide unsightly elements in the garden. They’re ideal for disguising fence posts, utility boxes, or foundation walls.
Cut Flowers
Hollyhock stalks make striking additions to large floral arrangements. Cut stems when flowers are just beginning to open for longest vase life. Remove leaves to prevent early wilting.
Pollinator Gardens
Hollyhocks attract bees, butterflies, and hummingbirds, making them valuable additions to pollinator gardens. Single flower varieties are generally more attractive to pollinators than double forms.
:strip_icc()/alcea-rosea-old-barnyard-hollyhock-ca629344-60ece34452c94844939ad381390abfc1.jpg)
Frequently Asked Questions
Common questions and troubleshooting tips for growing hollyhocks successfully.
Are hollyhocks annual or perennial plants?
Most hollyhocks are biennial (completing their lifecycle in two years) or short-lived perennials. They form leaf rosettes in the first year and flower in the second. In zones 3-8, they may return for several years, especially if allowed to self-seed. In warmer zones 9-10, they can sometimes be grown as annuals with a fall planting for spring blooms.
Why aren’t my hollyhocks blooming?
There are several possible reasons: (1) They may be first-year plants that haven’t reached flowering stage yet; (2) Insufficient sunlight—hollyhocks need at least 6 hours of sun daily; (3) Excessive nitrogen fertilizer, which promotes leaf growth at the expense of flowers; (4) Improper pruning that removed flower buds; or (5) Stress from disease or pests.
Can hollyhocks be grown in containers?
Yes, but with some considerations. Choose dwarf varieties like the ‘Queeny’ series, which grow 3-4 feet tall. Use large, deep containers (at least 18-24 inches in diameter and depth) to accommodate their deep taproots. Provide excellent drainage and consistent moisture. Be prepared to stake plants even in containers, and place the container in a location protected from strong winds.
How do I prevent hollyhock rust?
Prevention is key: (1) Choose rust-resistant varieties like Alcea ficifolia; (2) Space plants properly for good air circulation; (3) Avoid overhead watering and water at the base in morning hours; (4) Apply fungicide preventatively in early spring; (5) Remove lower leaves as they yellow; (6) Clean up all plant debris in fall and dispose of it (don’t compost); (7) Rotate the planting location if rust has been severe.
When should I cut back hollyhocks?
For self-seeding, allow some stalks to remain until seeds have matured and dispersed in late summer/fall. For disease control, cut back flowering stalks after blooming ends. In fall, cut all stalks to about 6 inches above ground level and clean up all debris. In spring, remove any dead or damaged foliage from overwintered plants as new growth emerges.
Can I divide hollyhock plants?
While hollyhocks can be divided, they’re not ideal candidates due to their deep taproots. Division is best attempted with younger plants in early spring or fall. Carefully dig up the entire plant, preserving as much of the taproot as possible, and divide the crown with a sharp, clean knife. Replant divisions immediately and keep well-watered until established. Seed propagation is generally more reliable.
How long do hollyhock plants live?
True biennial hollyhocks live for two years. However, many modern varieties are short-lived perennials that can live for 3-5 years in ideal conditions. Hollyhocks readily self-seed, creating the impression of longer-lived plants as new seedlings replace older ones. To maintain a continuous display, allow some plants to set seed each year or start new plants every 1-2 years.